project

All posts tagged project

I started writing this post over four years ago, in April of 2018, just before putting the bus on the road. I don’t remember why I never finished, maybe I just forgot. As of June 2022 I’ve put around 12k miles on the bus and have had many adventures with it. I’m working on a new post to continue where this one ends.

The bus is almost on the road.

The body work was finished last summer, decided on a two tone purple/green external color combination and rattle can sprayed it in my garage. I even setup AC units and dehumidifiers to improve the quality of the paint.

After that I went hardcore on the interior and electrical. I started with a generic 21 circuit automotive wiring kit and made a custom engine harness (since the kit’s harness was for a front engine vehicle). I cut out the old driver’s seat bulkhead and welded in a custom track to fit the driver’s seat from an Audi A3.

The dash retains an original speedo (maybe from this bus, maybe from a different bus), most of the original indicator lights, but that’s about it. Due to missing or broken original pieces, the dash also has custom turn signal and hazard flasher, custom light switch (GM style), a generic wiper switch, and a plethora of aftermarket switches that do anything from hi-lo beams, to swapping which battery the stereo runs from. Elsewhere in front we have an inexpensive plastic package tray setup, and LED light strips that come on with the front doors or by switch.

Elsewhere in the bus I reinstalled the original Westfalia Campmobile interior, minus the icebox/sink (awaiting a rebuild). Then I added a custom leisure battery system and charging circuit. This system is fully functional, but currently only runs the radio/amp, and some lights. The engine bay I cleaned up and painted white, then added a couple sets of LED lights to brighten up the bay.

In late fall I started work on the drivetrain, a very leaky 2000cc and 6-rib (091) transmission from a scrapped ’79. It ran okay, but definitely needed a rebuild, even if only because of how severely it leaked oil out. I also began work on the transmission which looks like it was in good shape. I started by stripping the engine of its tin and air boxes so that they could all be cleaned up and repainted. Part way through this there was a change in my financial situation affording me a rebuilt 2000cc long block and a new dual Weber 40IDF 2bbl carb setup.

Thanks to having that rebuilt long block I could finish this project sooner. I finished assembling the remaining engine pieces along with freshly cleaned and painted engine tin. The engine had its first test run this past weekend, quite successfully. Then I installed the engine in the bus.

To Be Continued in Part 2

In a previous post I mentioned starting the reassembly of my 1973 VW Westfalia camper, aka the bus. I originally had plans to completely customize the bus, even planned a custom dash. Over the years I had considered making it electric, throwing a modern 2.0T like my Audi has into it, and of course putting a diesel motor (OM616 w/turbo) from a Benz into it. Those plans never came to fruition, but other plans started to form.

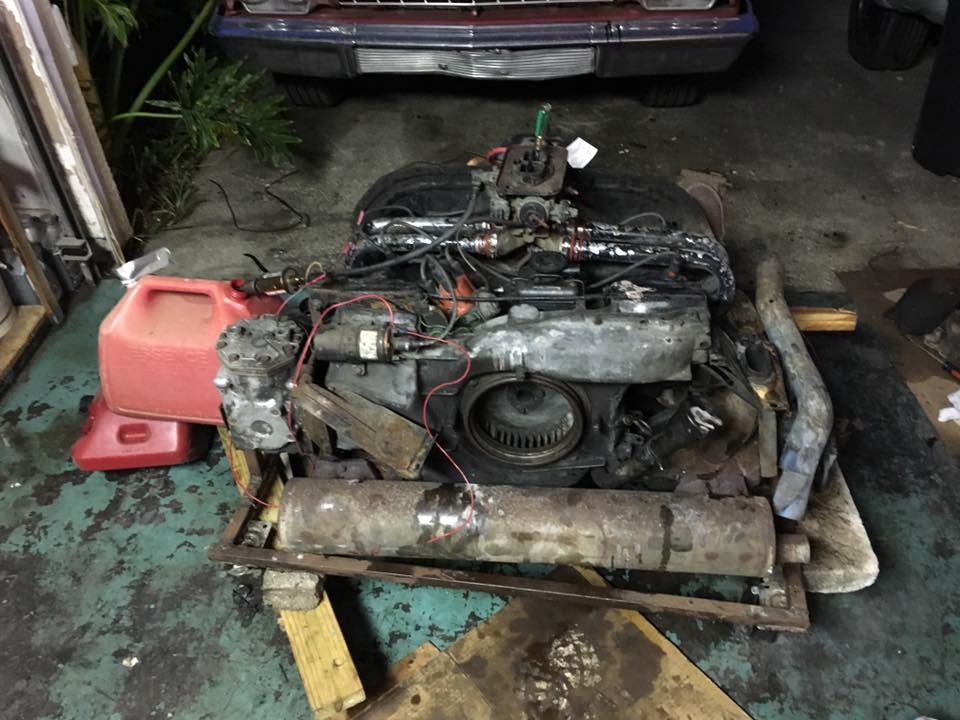
Seven years ago I was blessed with the luck of the Irish and able to obtain a running VW type 4 2.0l w/AC out of a ’79 panel van that had been scrapped for parts. This motor would bolt right into my bus, plus it came with a six rib transmission and a slew of extra parts, for a fraction of their value. I built an engine stand for the motor and was able to fire it up, made sure it ran, then stuck it where it fit in my garage.

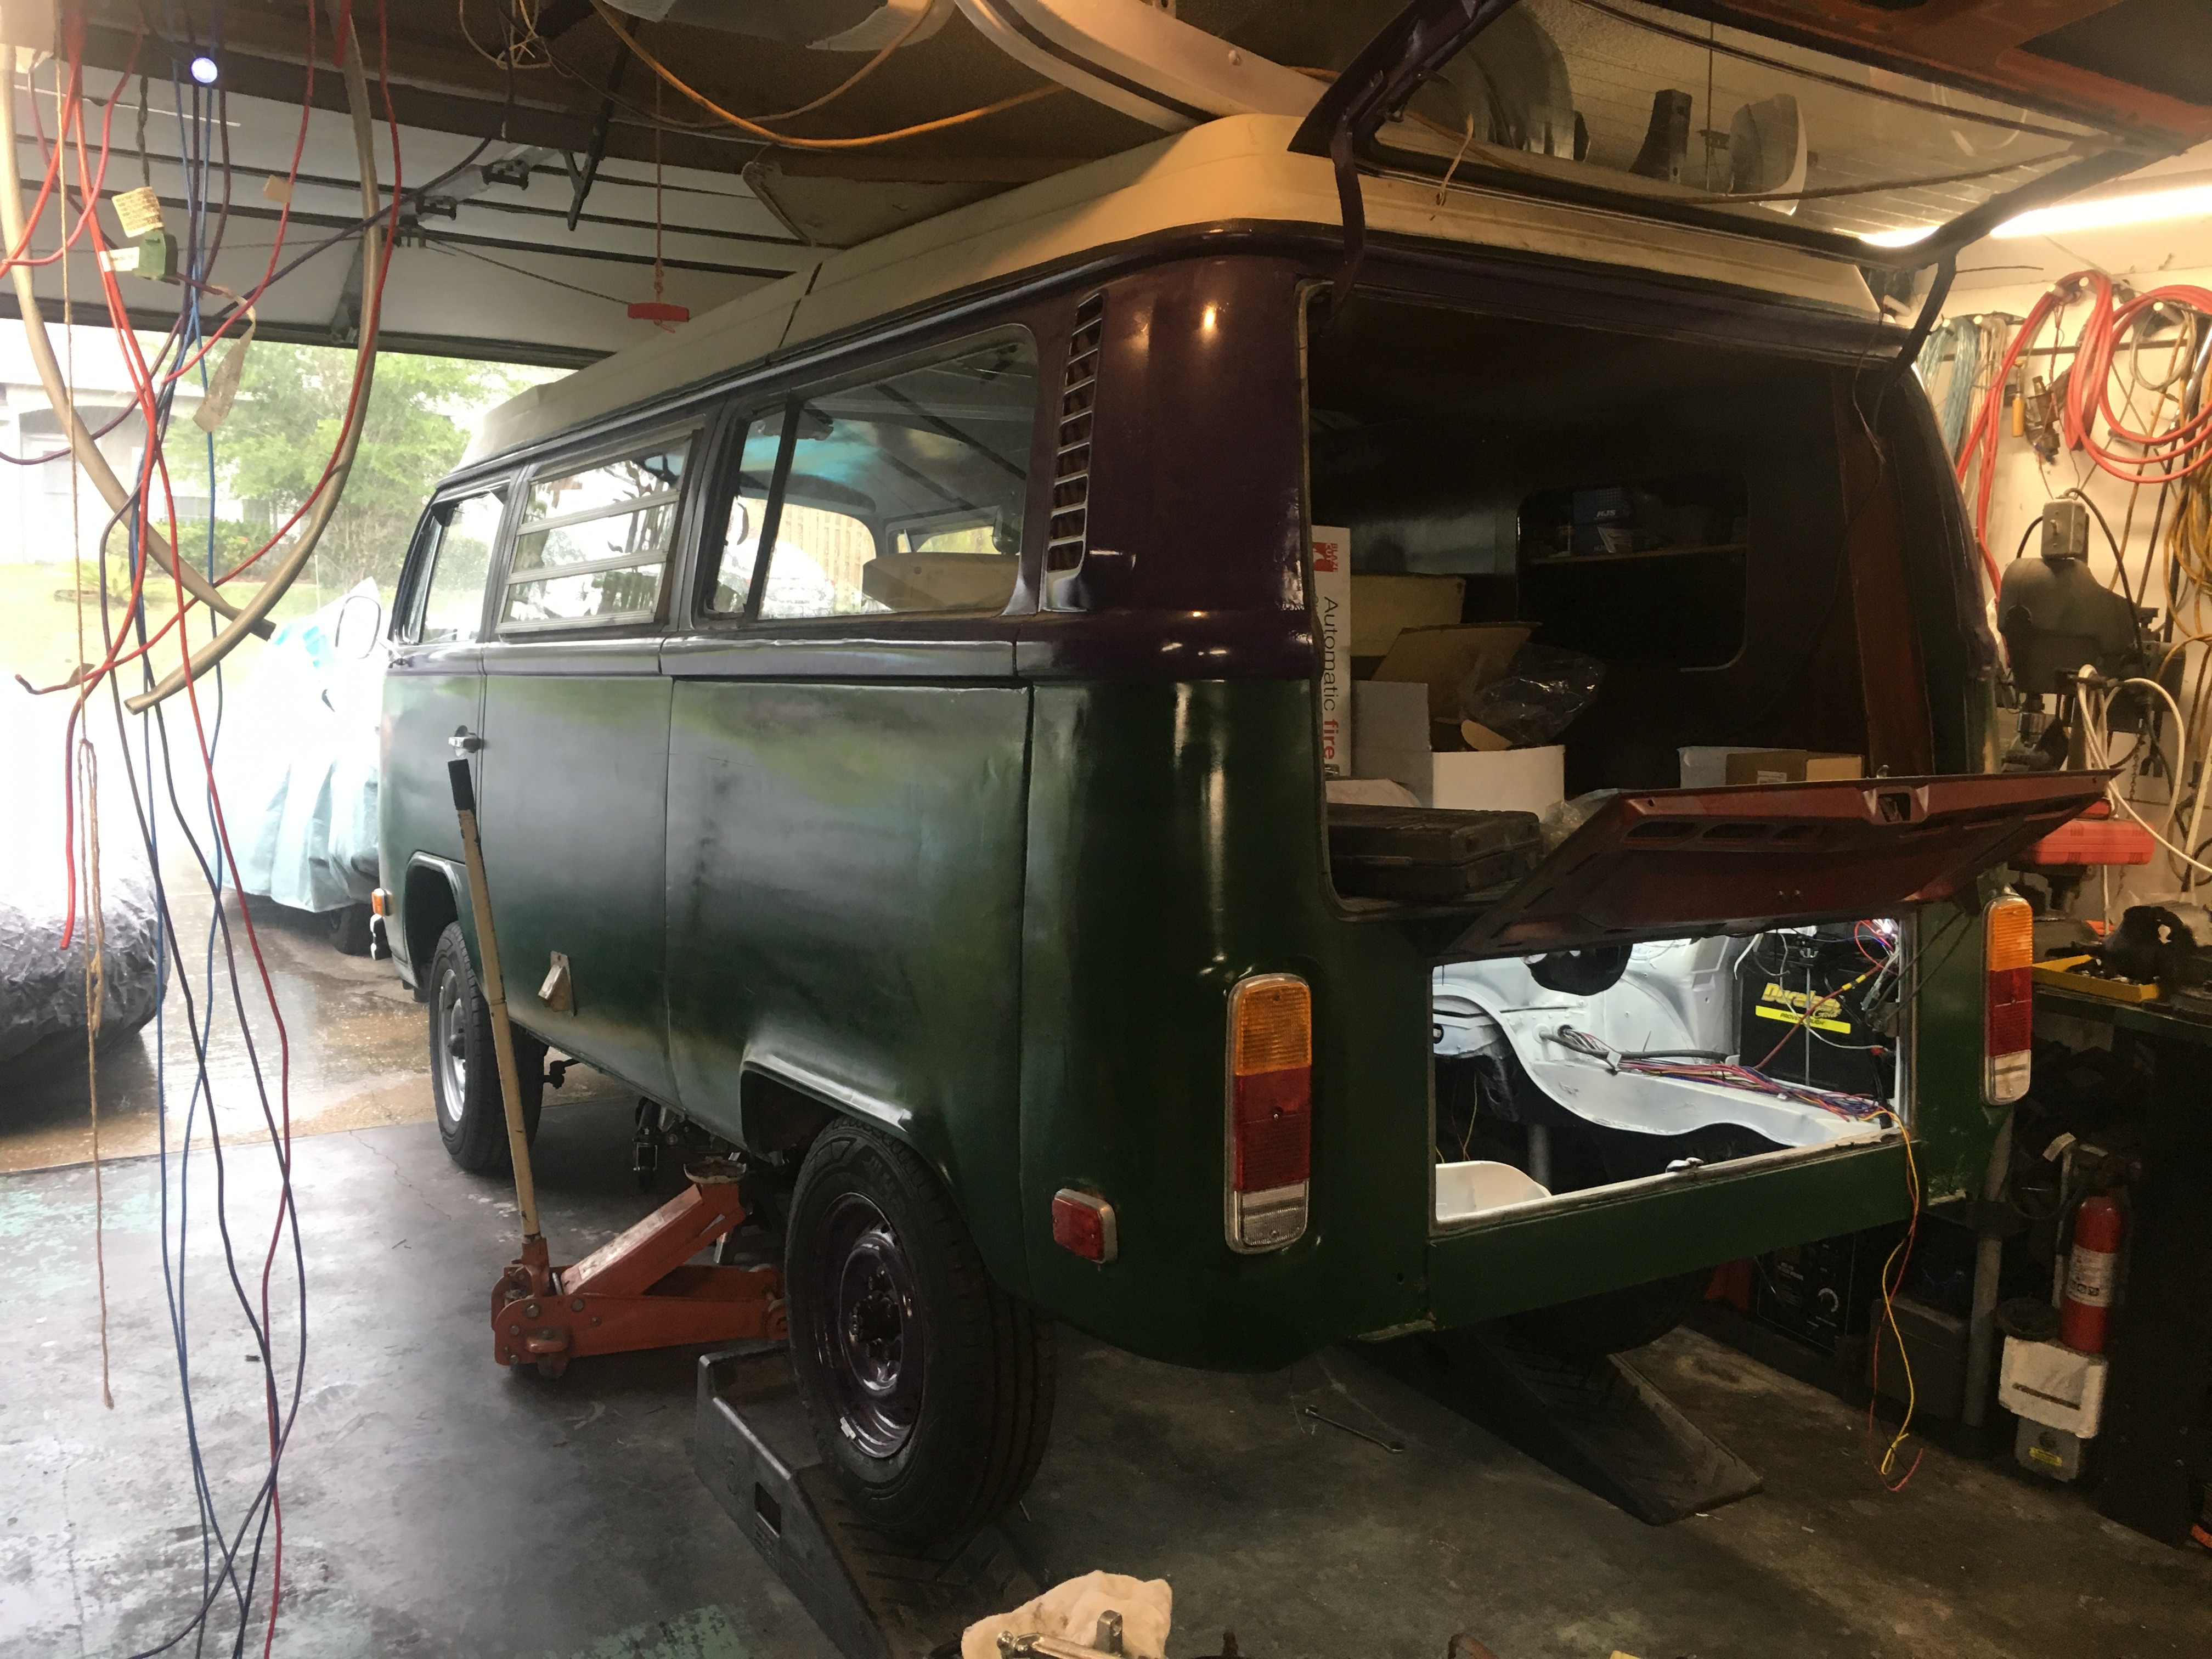
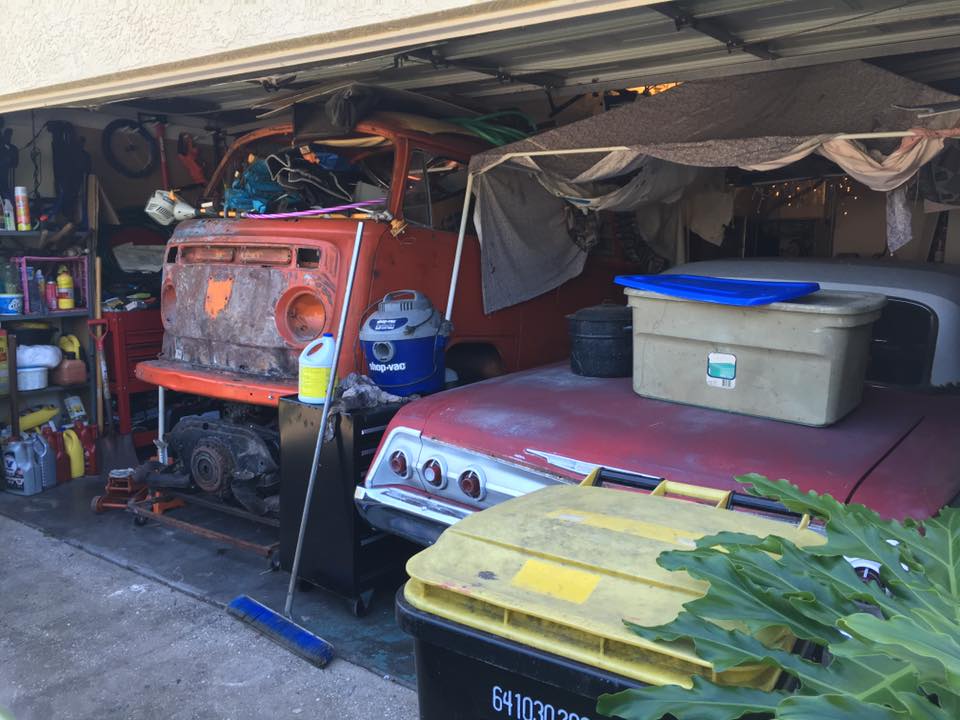
My first goal with the bus was to fix the body work. I started simple, banging out damage to the sliding door. The door would fall off and smash up the corner. Fixed the slider, fixed the smashed corner, then started work on the front clip.

The nose of the bus had been smashed in badly, the passenger door wouldn’t open plus the heat vents couldn’t be reinstalled. Using a slide hammer back in 2011, I pulled most of the accident damage out and was working on fixing the door area when my wrist issues began to act up. Carpel tunnel is painful, add the guyon’s canel to it and the pain becomes unbearable. I gave up on the bus, hoping that in a few years I may be strong enough to resume.

Fall 2013 I moved to South Florida, throwing my most valuable bus pieces into boxes for storage, saying bye to my ’73 bus thinking I may never see it again. It was a good dream, one that I would revisit once resettled in South Florida and earning the big money. South Florida didn’t pan out quite that well, my house renters became squatters, eventually giving up on any house maintenance or cleaning, and I grew ever more broke trying to afford a mortgage and rent.

Fall 2016 I move back to my house, finding my bus, its title, and almost all the pieces intact. The bus had become a cockroach filled storage unit for old broken camping equipment and trash. Many of the interior pieces were covered in cockroach (and probably rodent feces), as was most of the garage. My plan is to fix and sell my house, and I’m highly allergic to every bit of filth and dirt inside the house and garage, so I am forced to clean everything. As the months go on I unpile the bus interior and mechanical pieces, and clean them up to find them all still in good shape, most needing minor to no repairs.

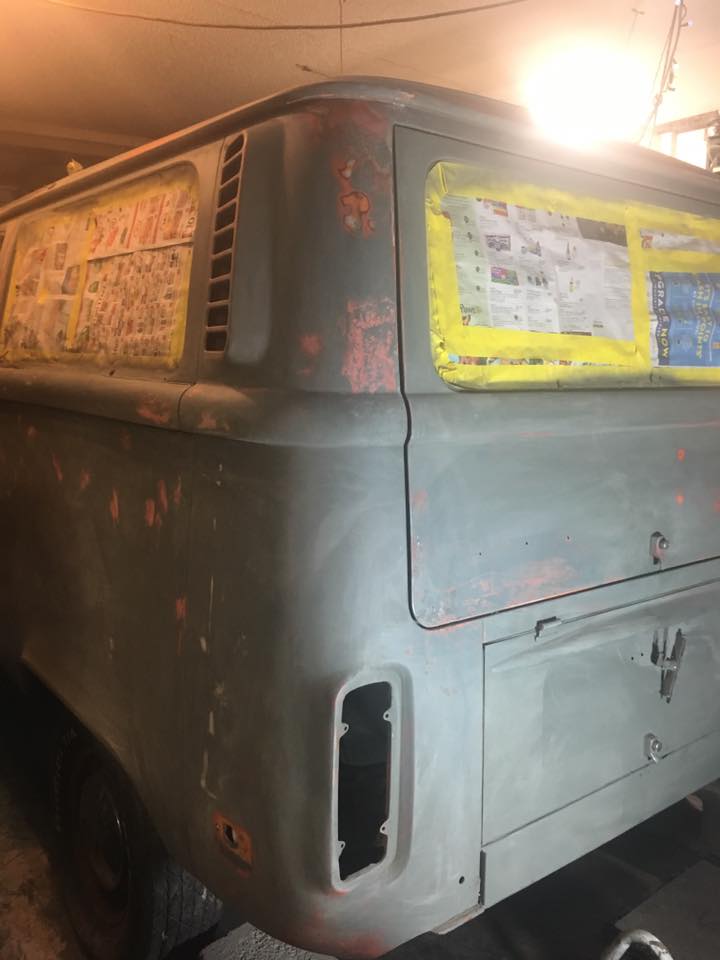
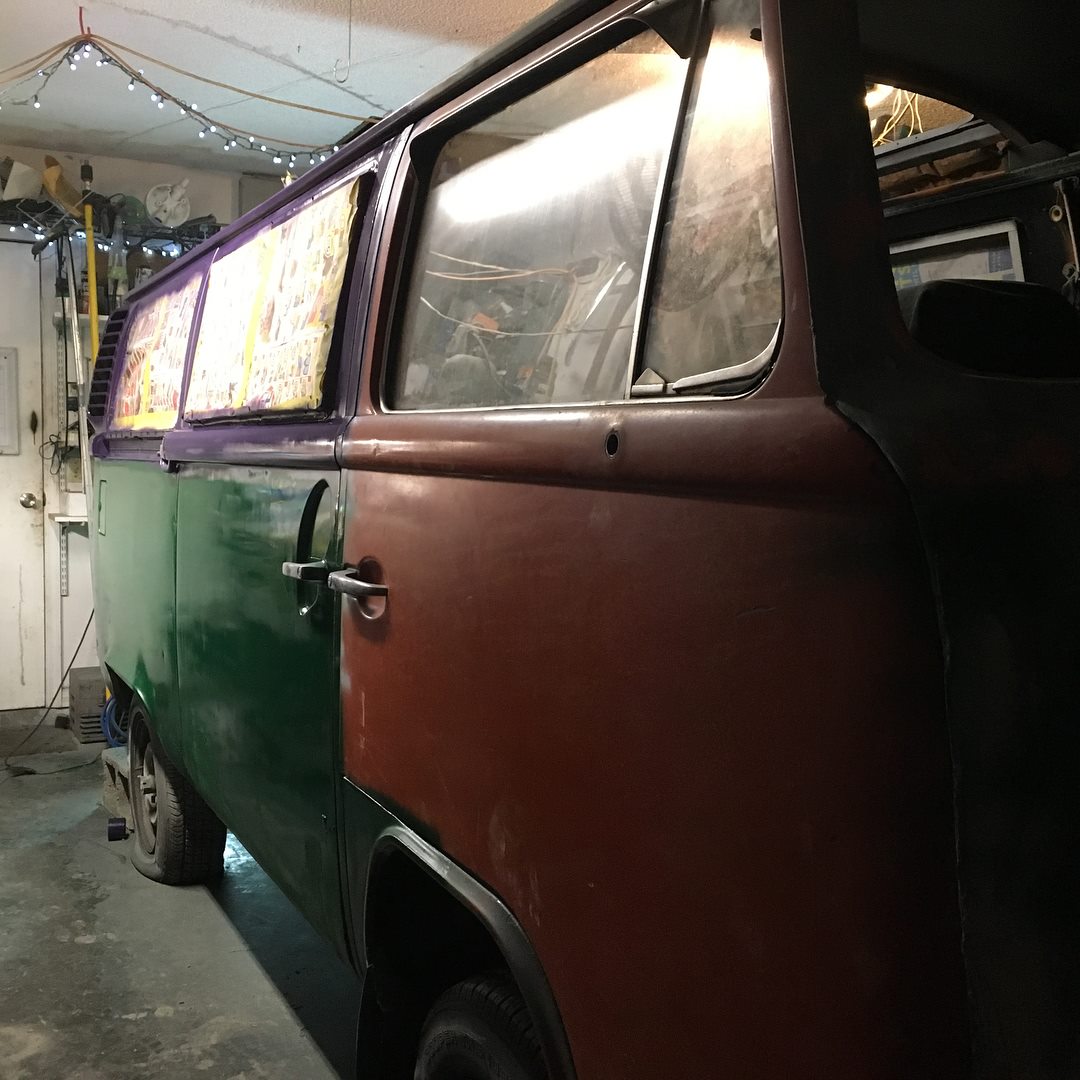
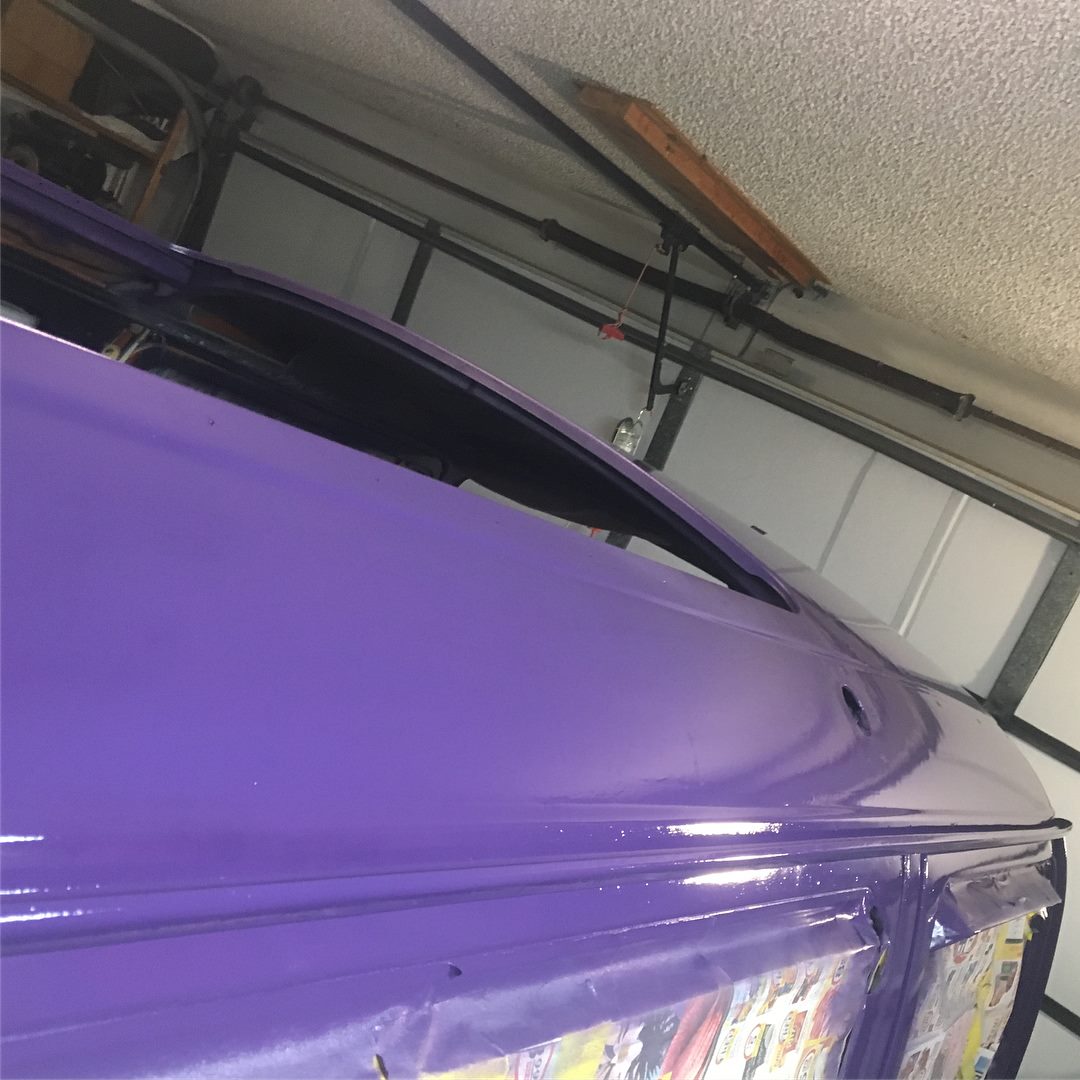
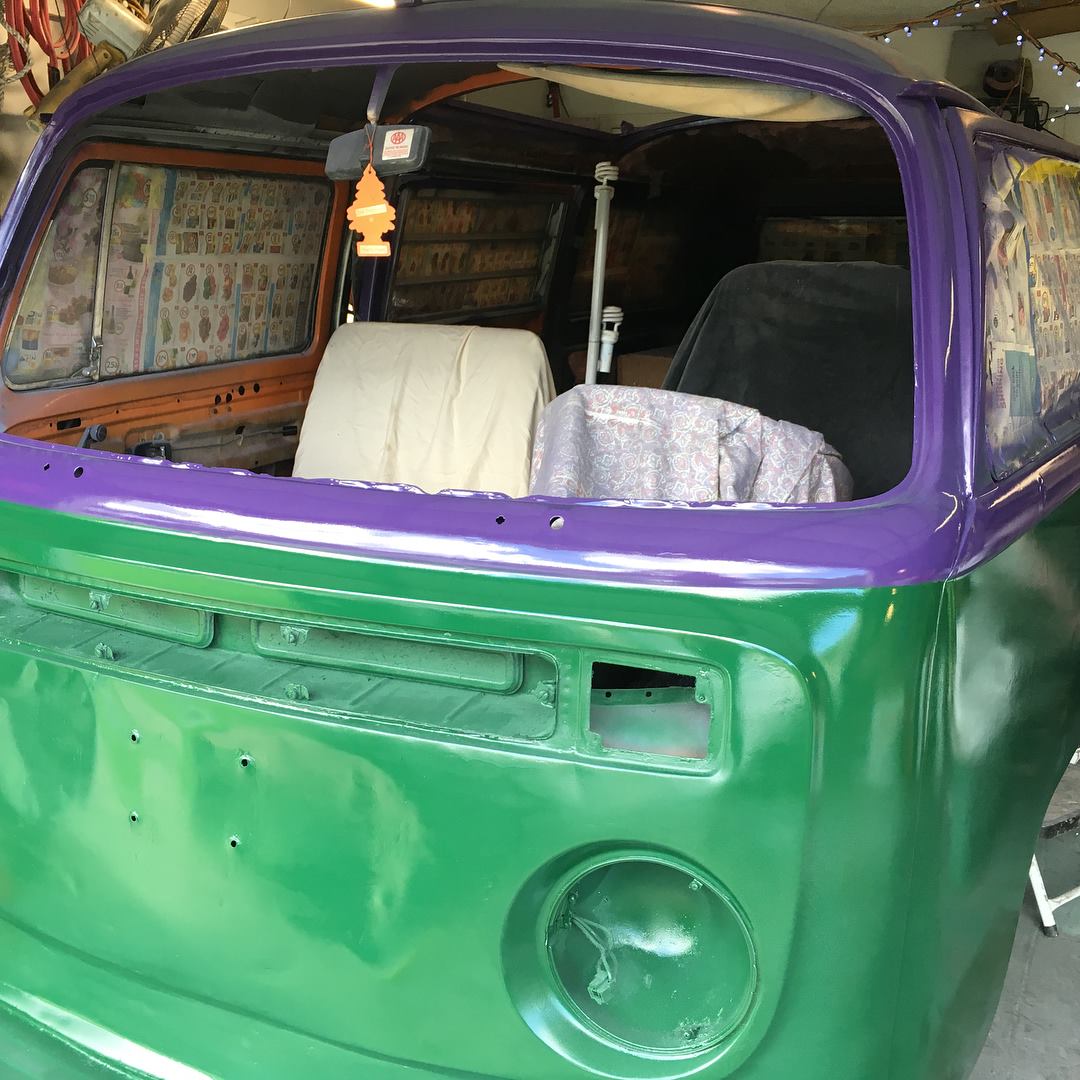
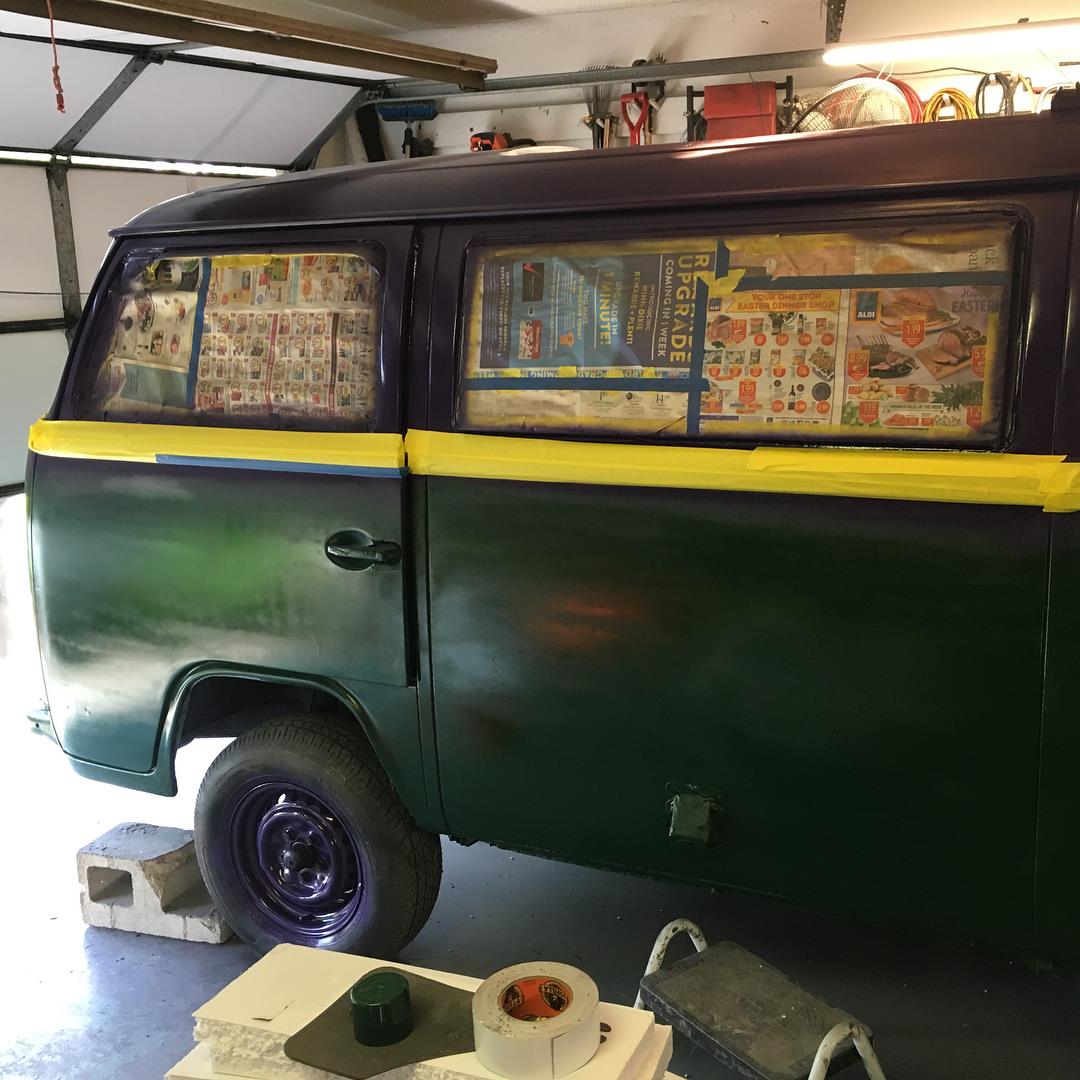
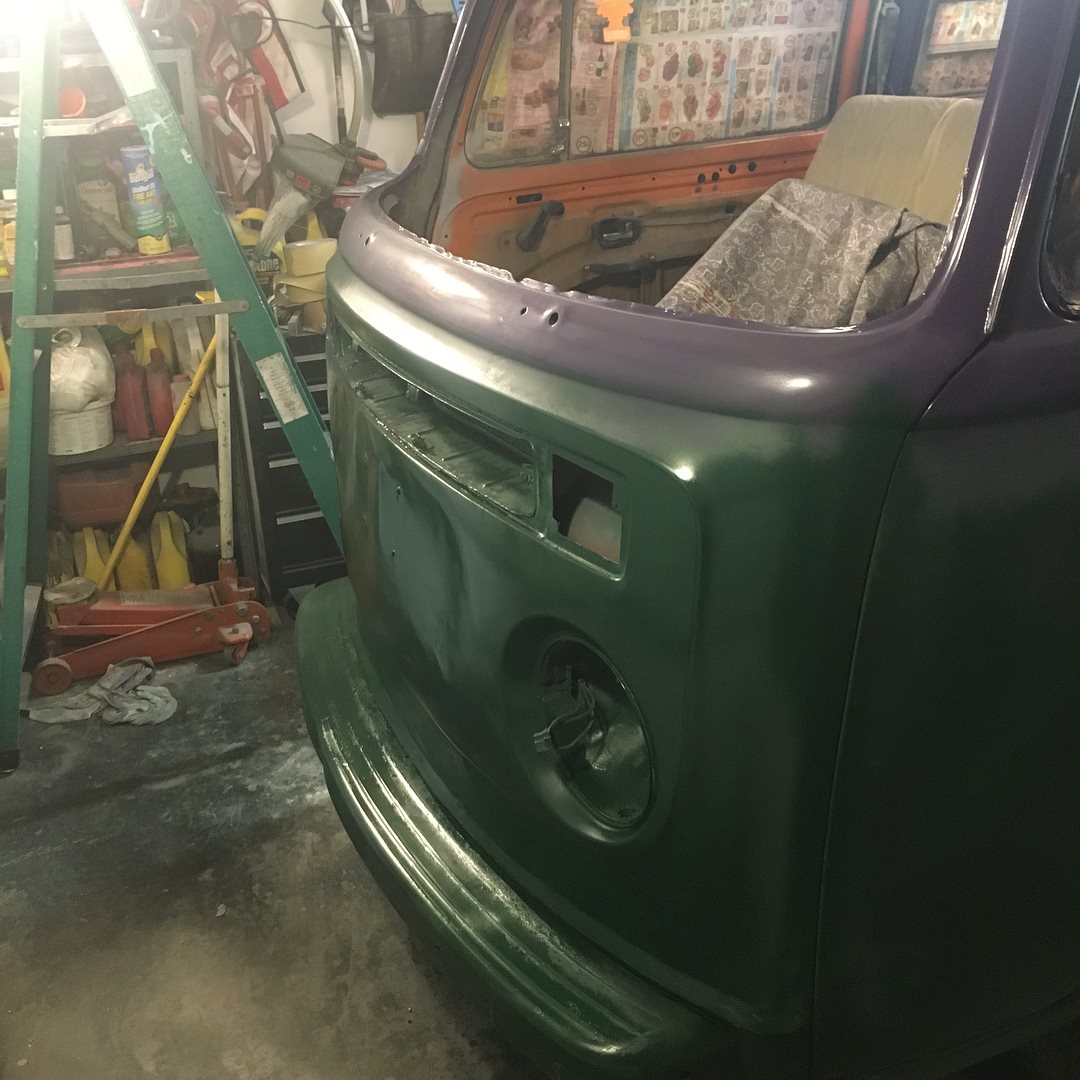
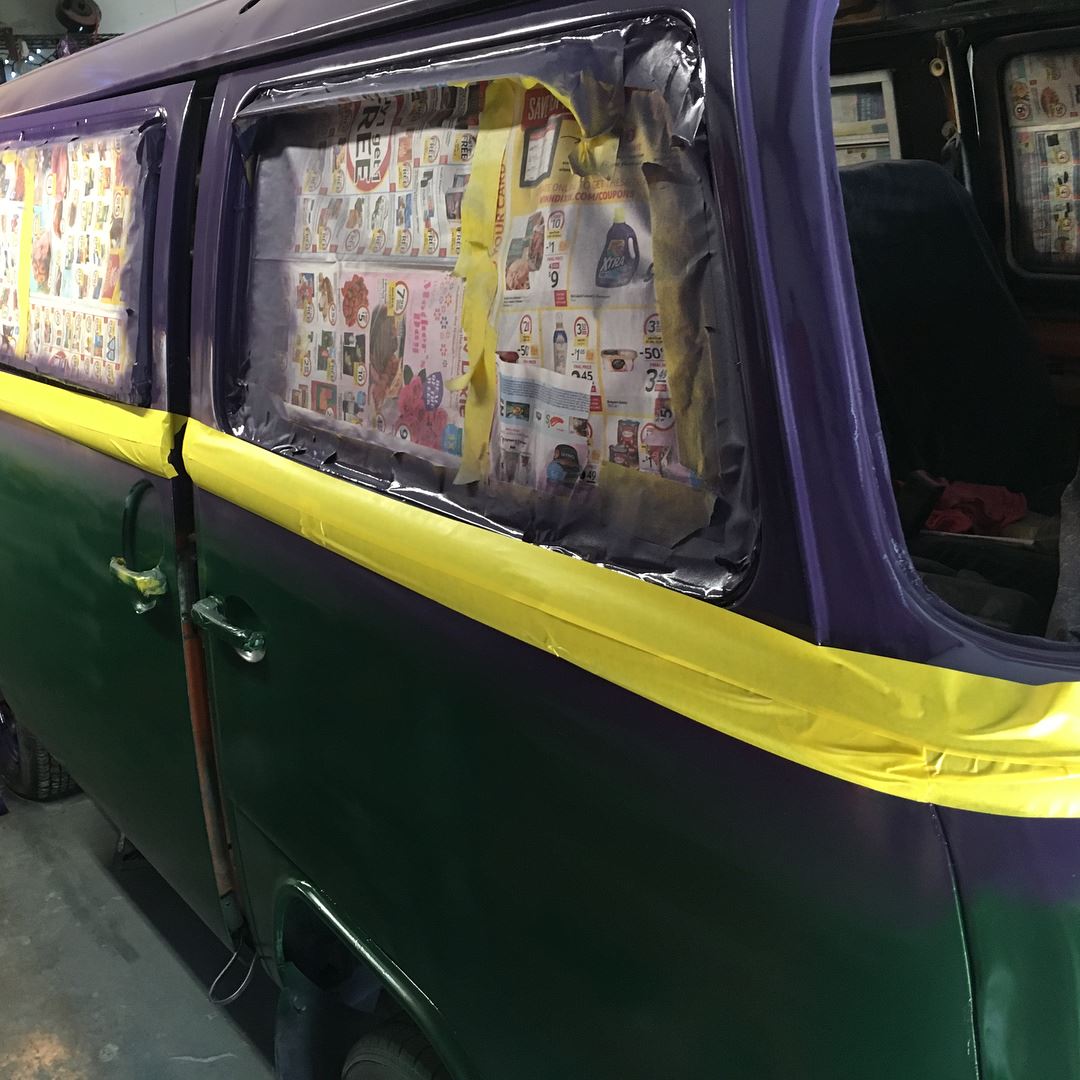
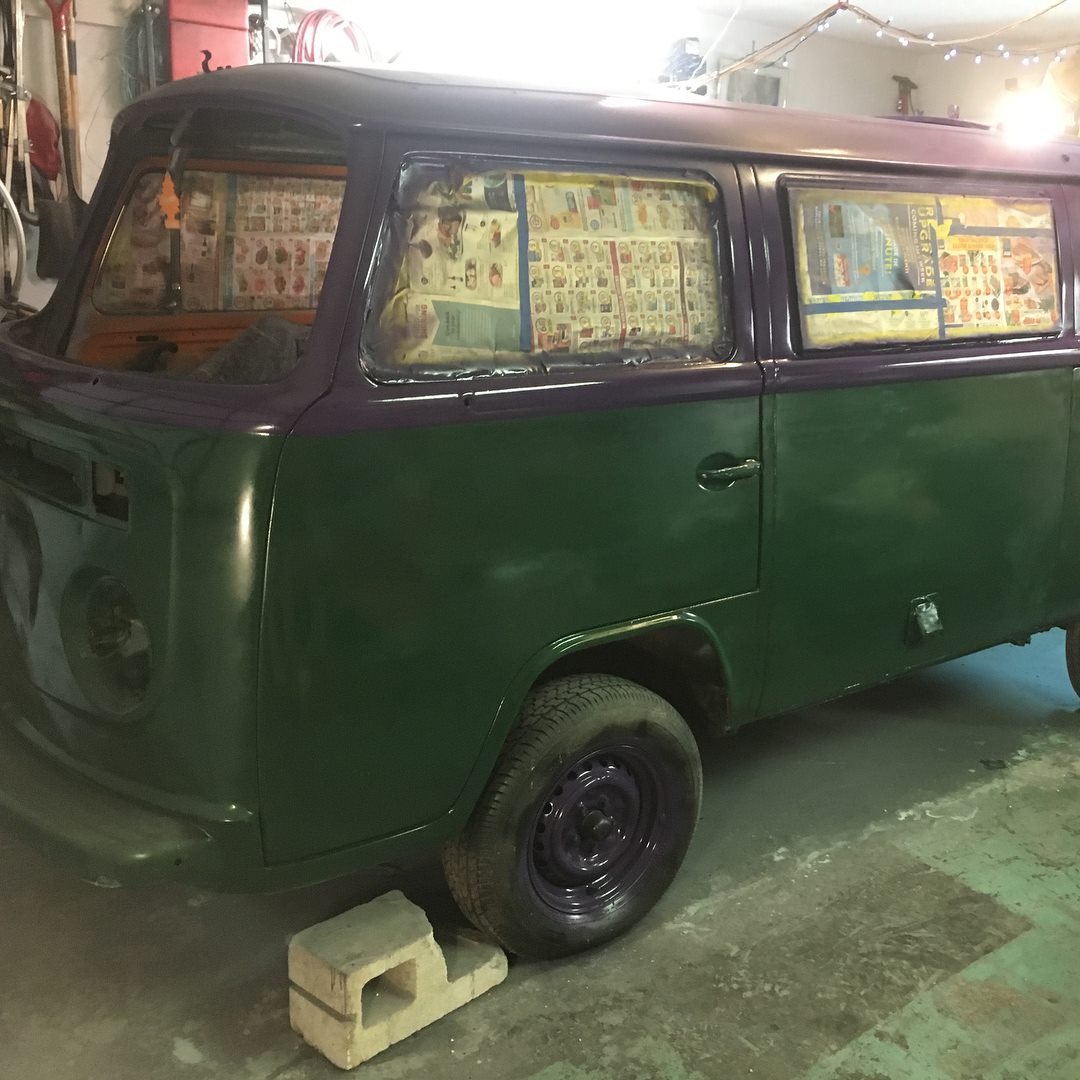
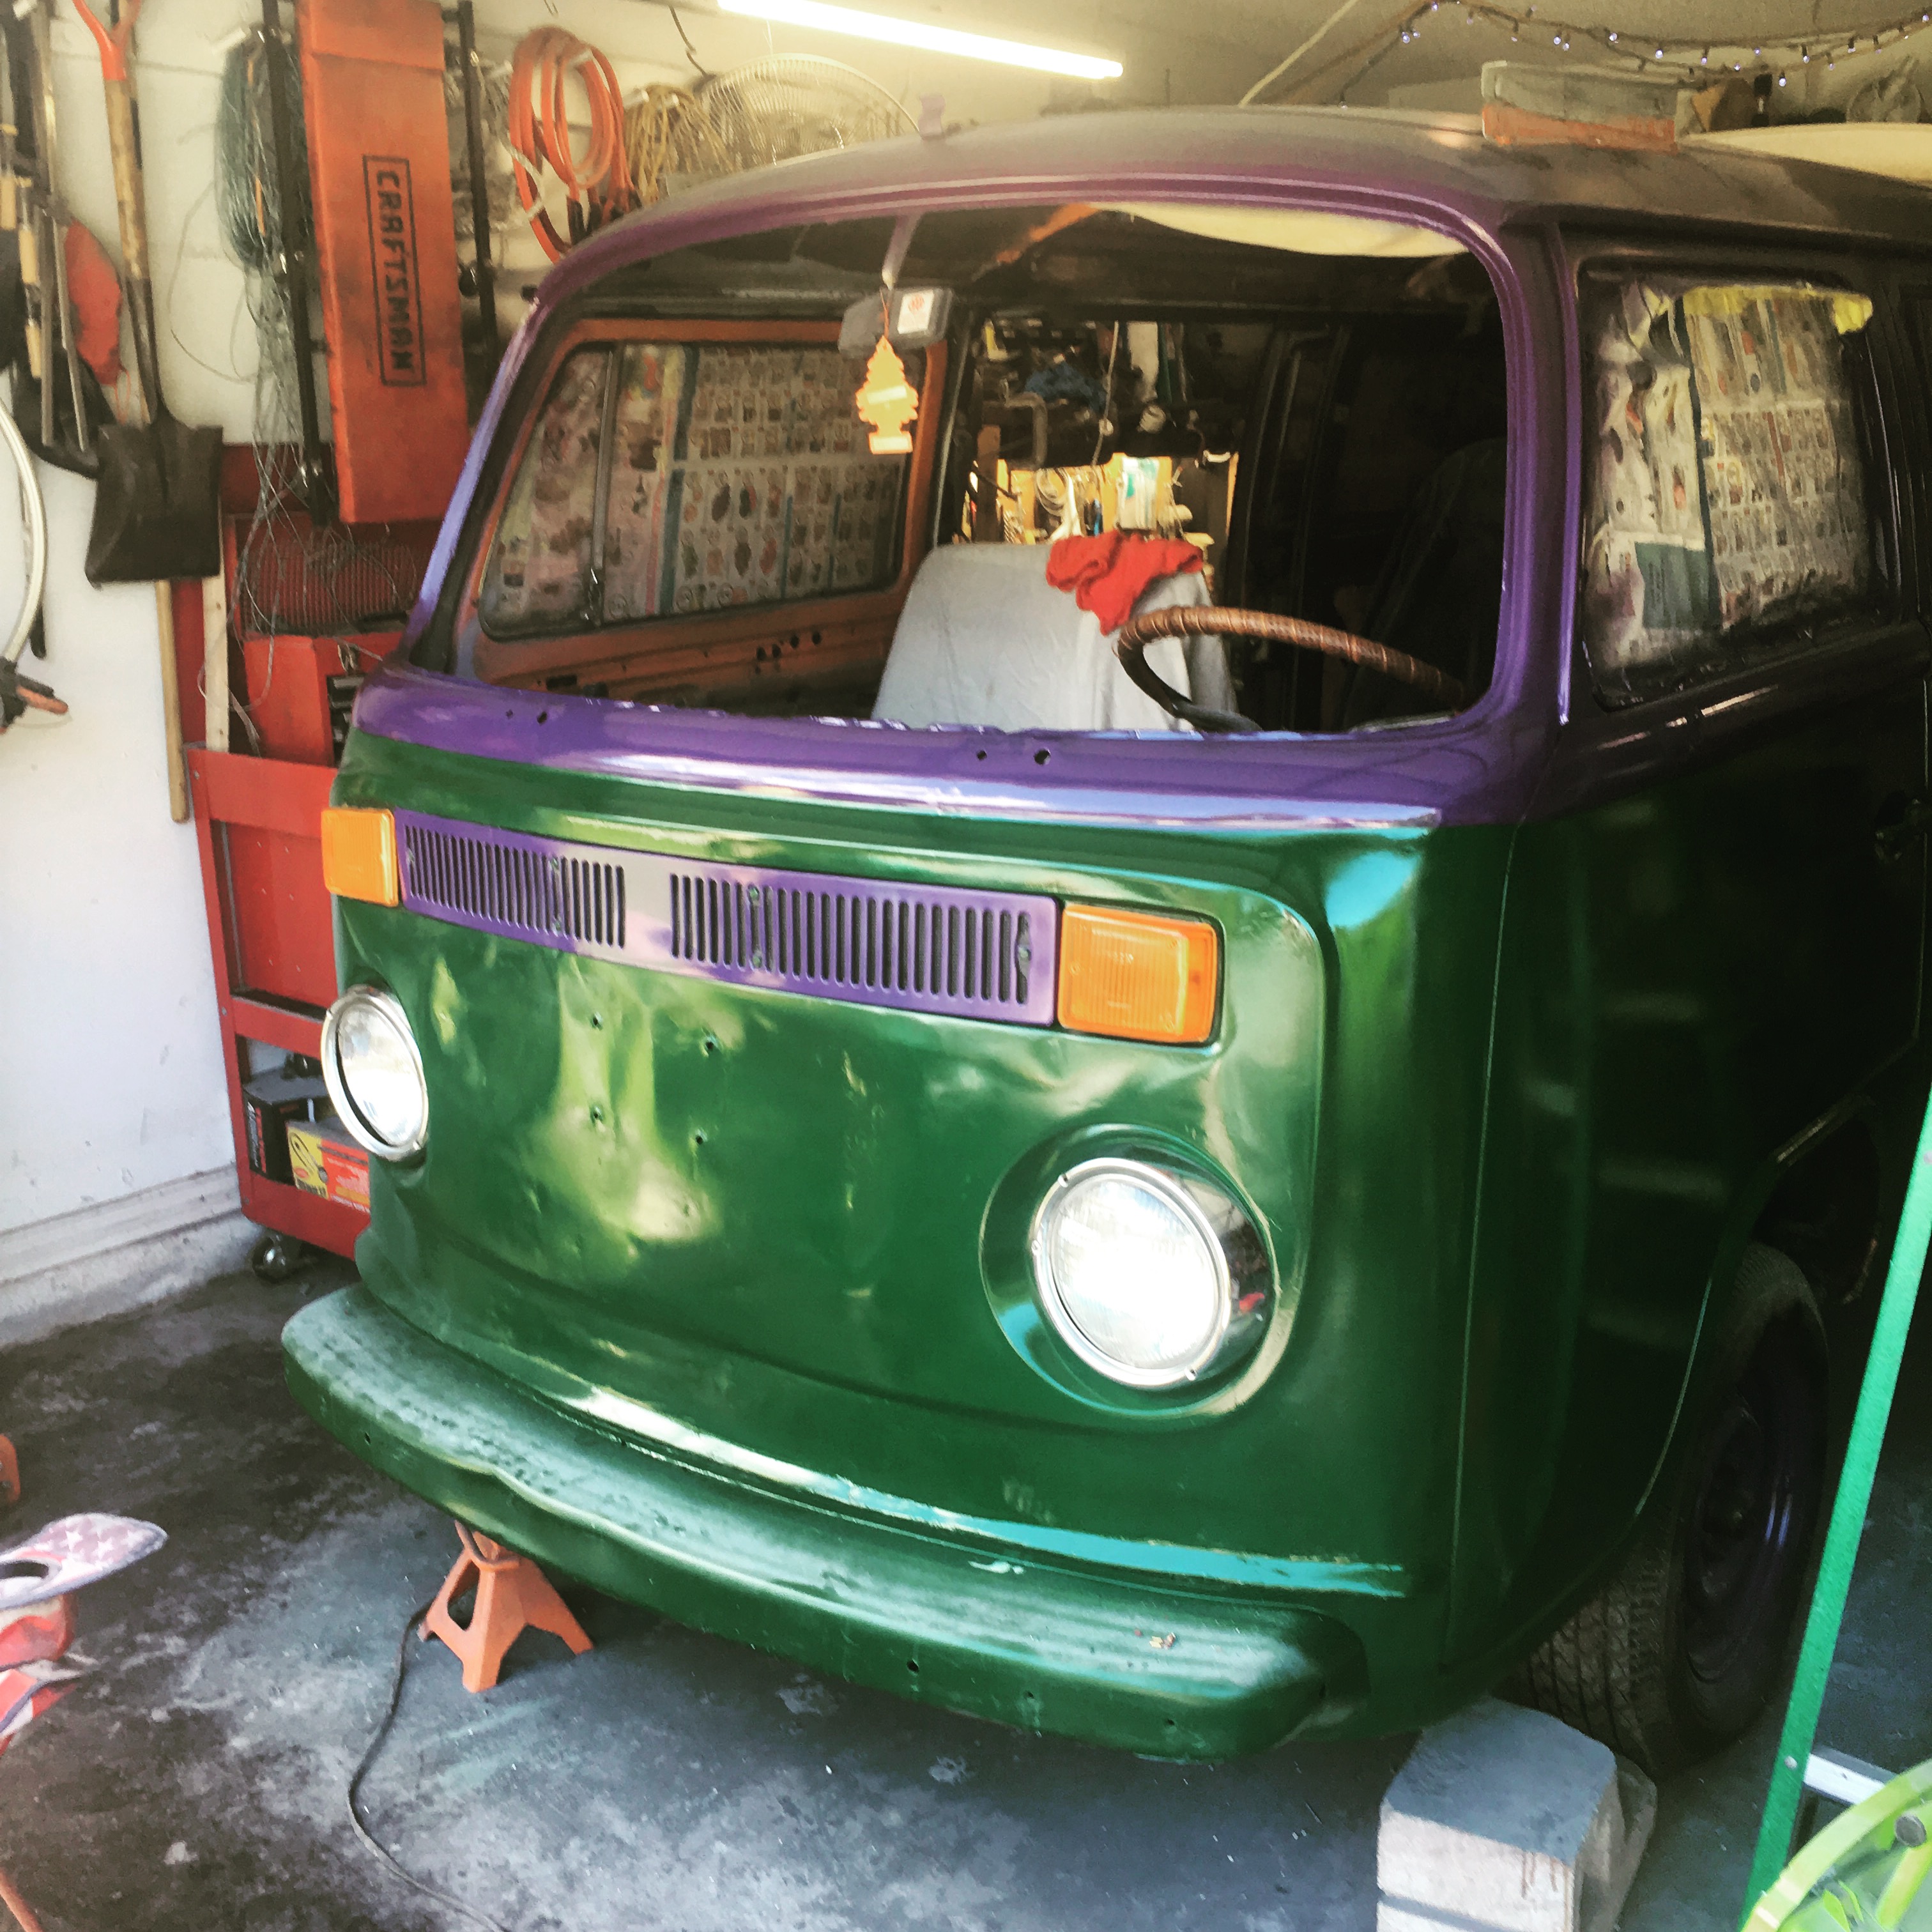
Winter, February 2017, the house repairs are coming along  slowly, but well, but there are bus parts constantly getting in my way. So I bet myself I can do the body work and roadkill this bus back together. So one evening I take my scraper, paint stripper, and a blow torch to areas that have obvious bondo issues.

Nearly three months later and the body work is nearly done. The interior is read to have interior put in and most of the severe body damage and rust is repaired. There is accident damage to the front clip preventing the passenger door from opening and closing, but I’m stronger now, I can swing the heavy hammers without triggering a severe flare up. It’s going to be hard work to get that door to open and close properly, work I may not have the skills to do, but I’m trying.

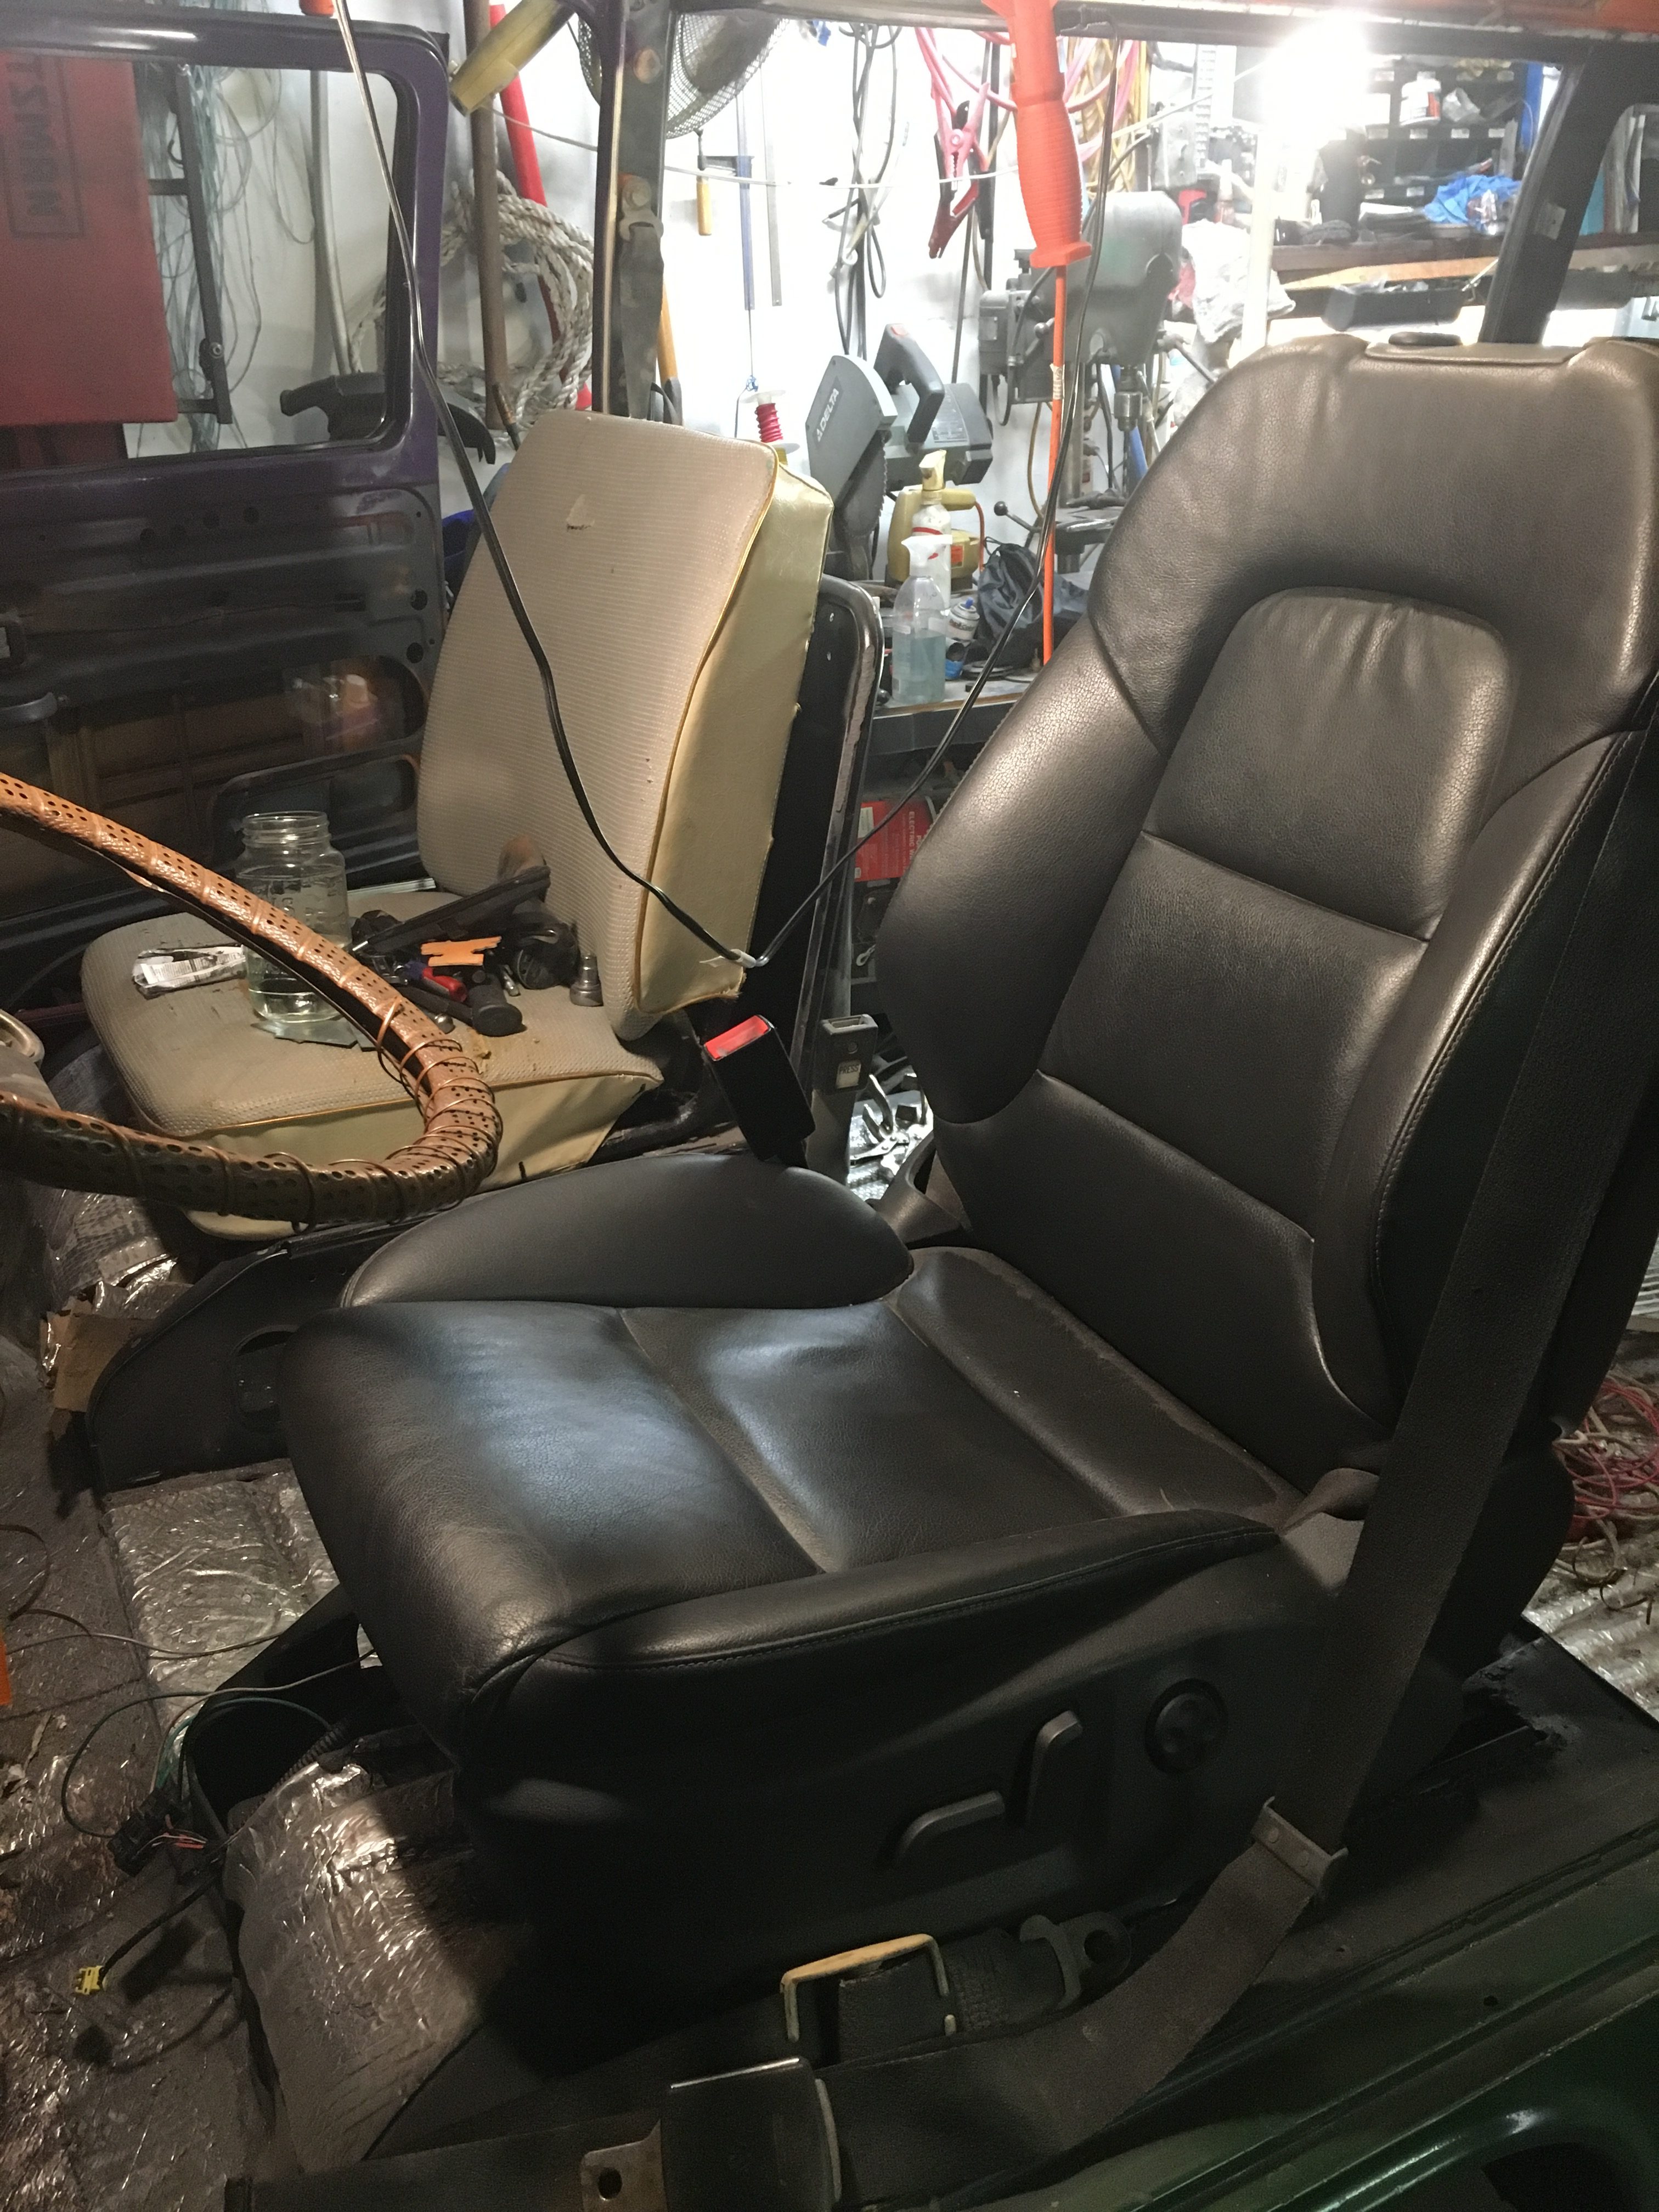
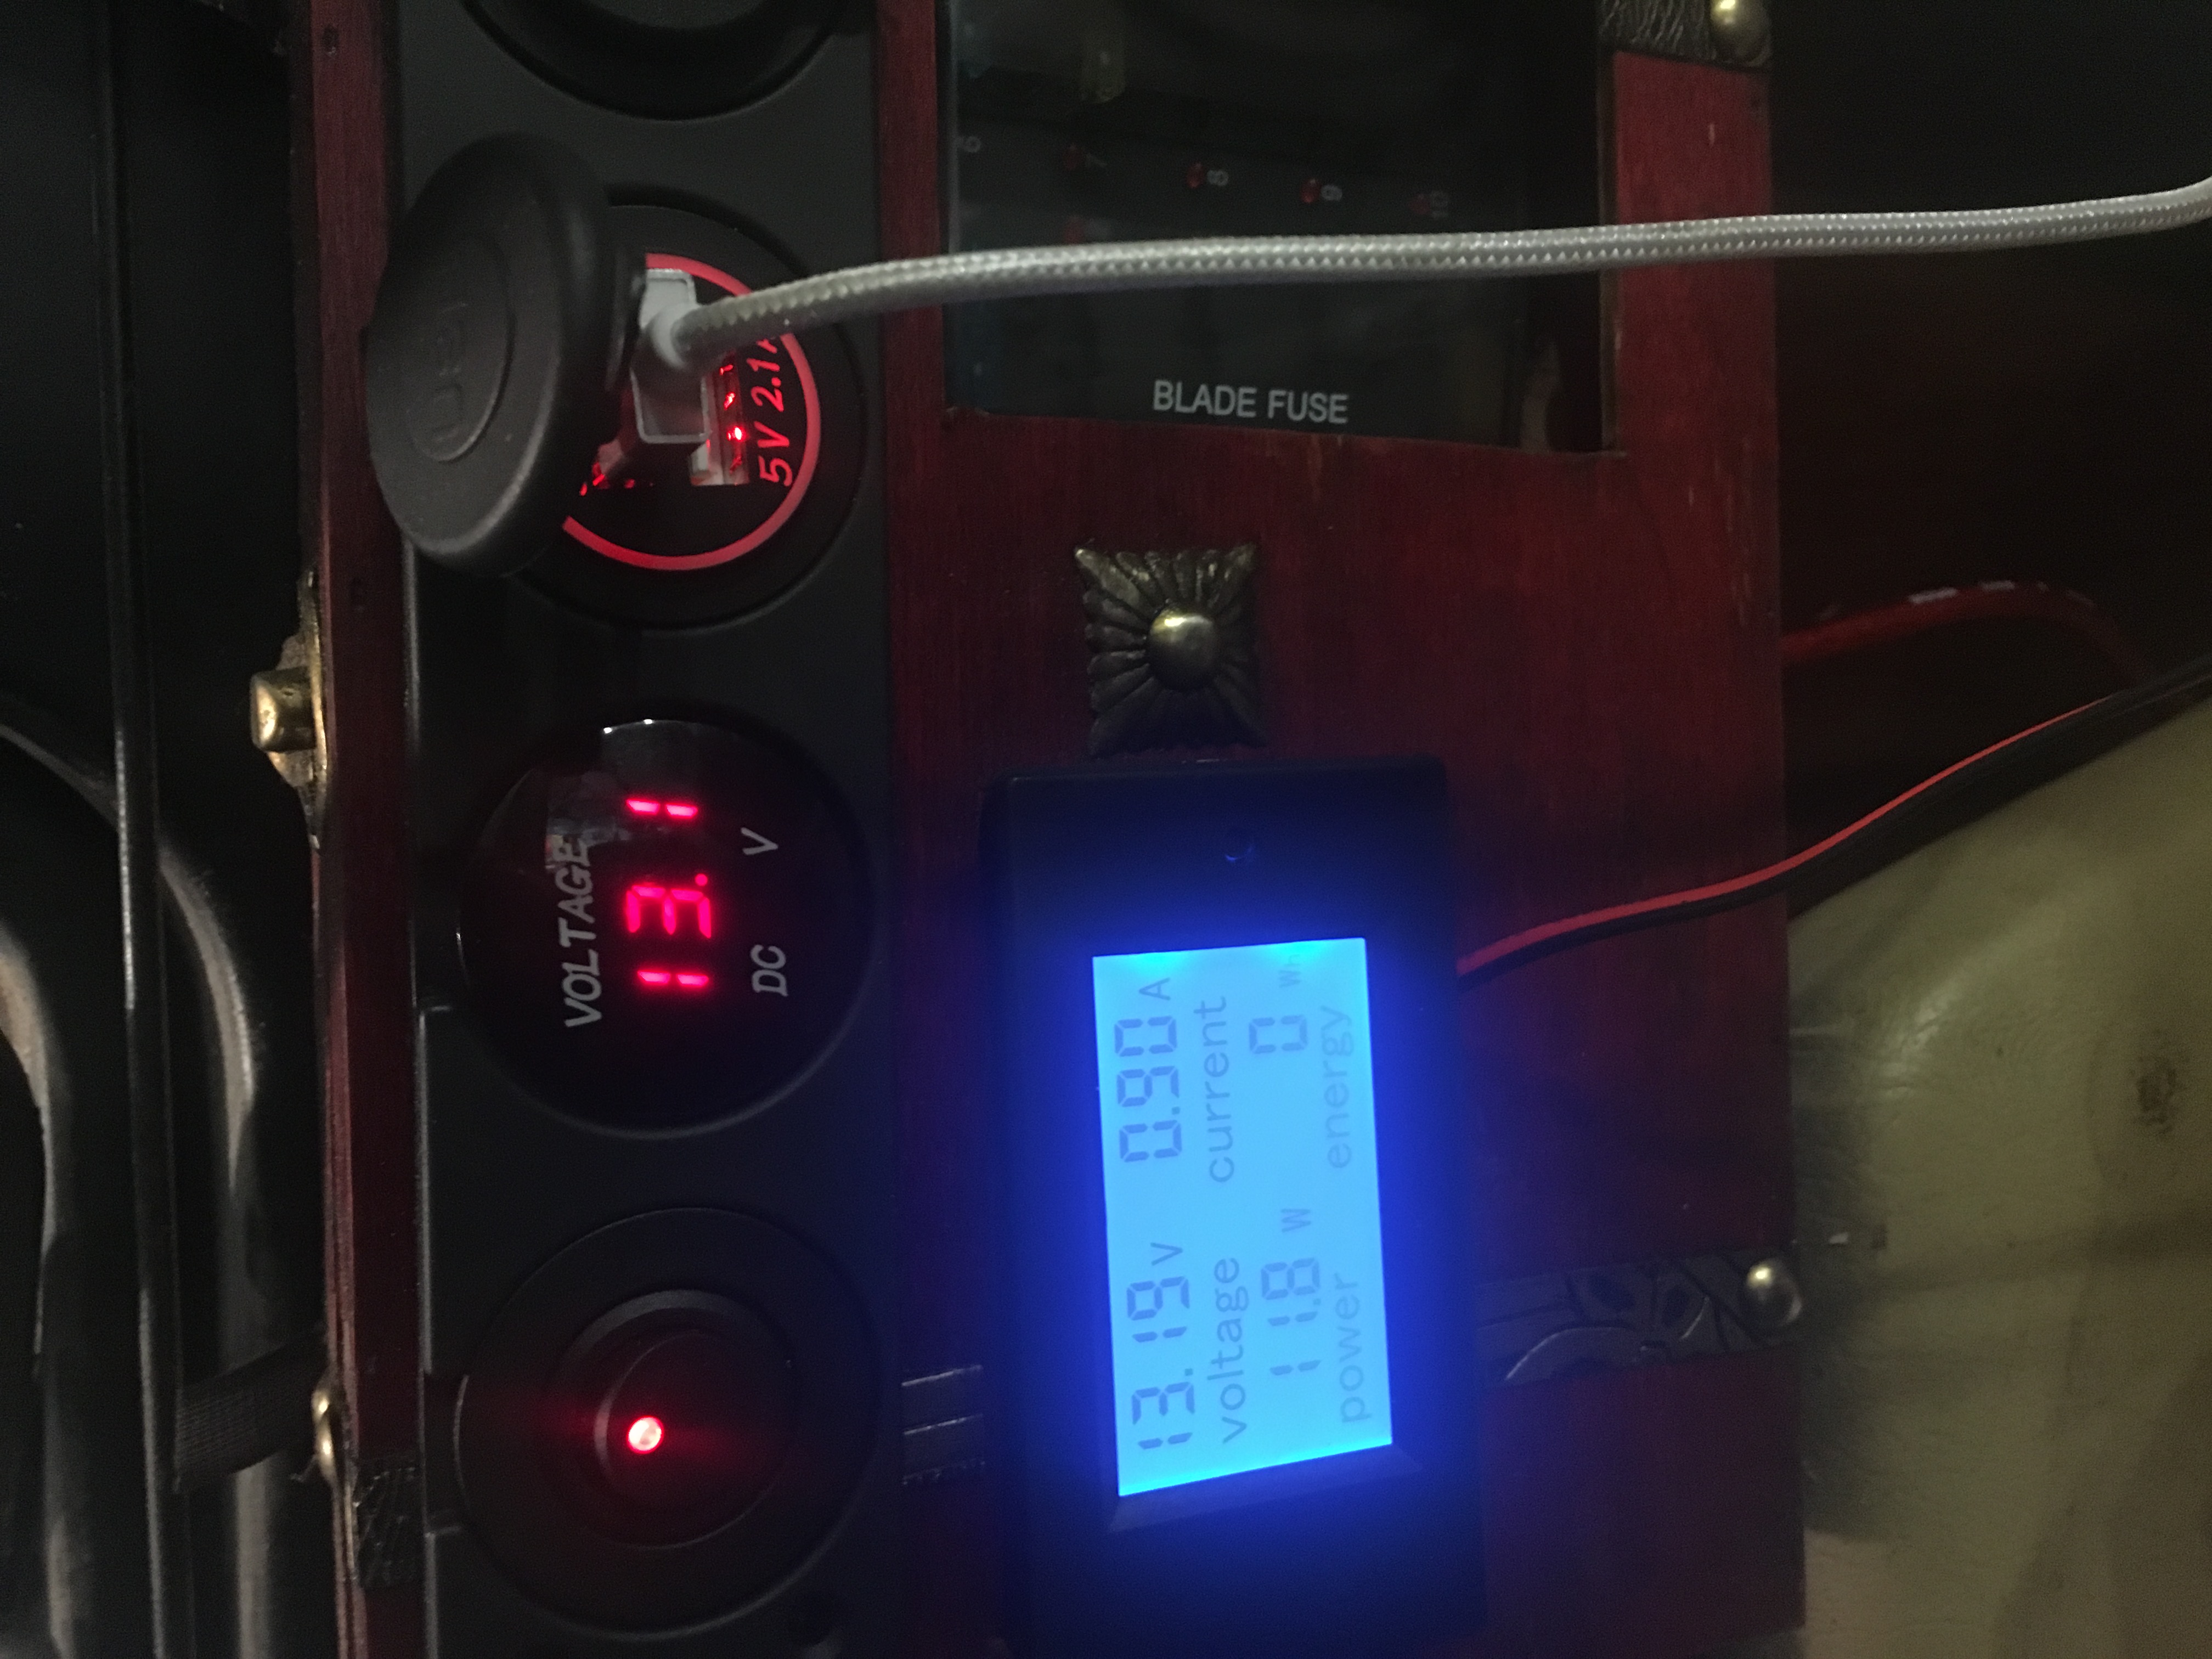
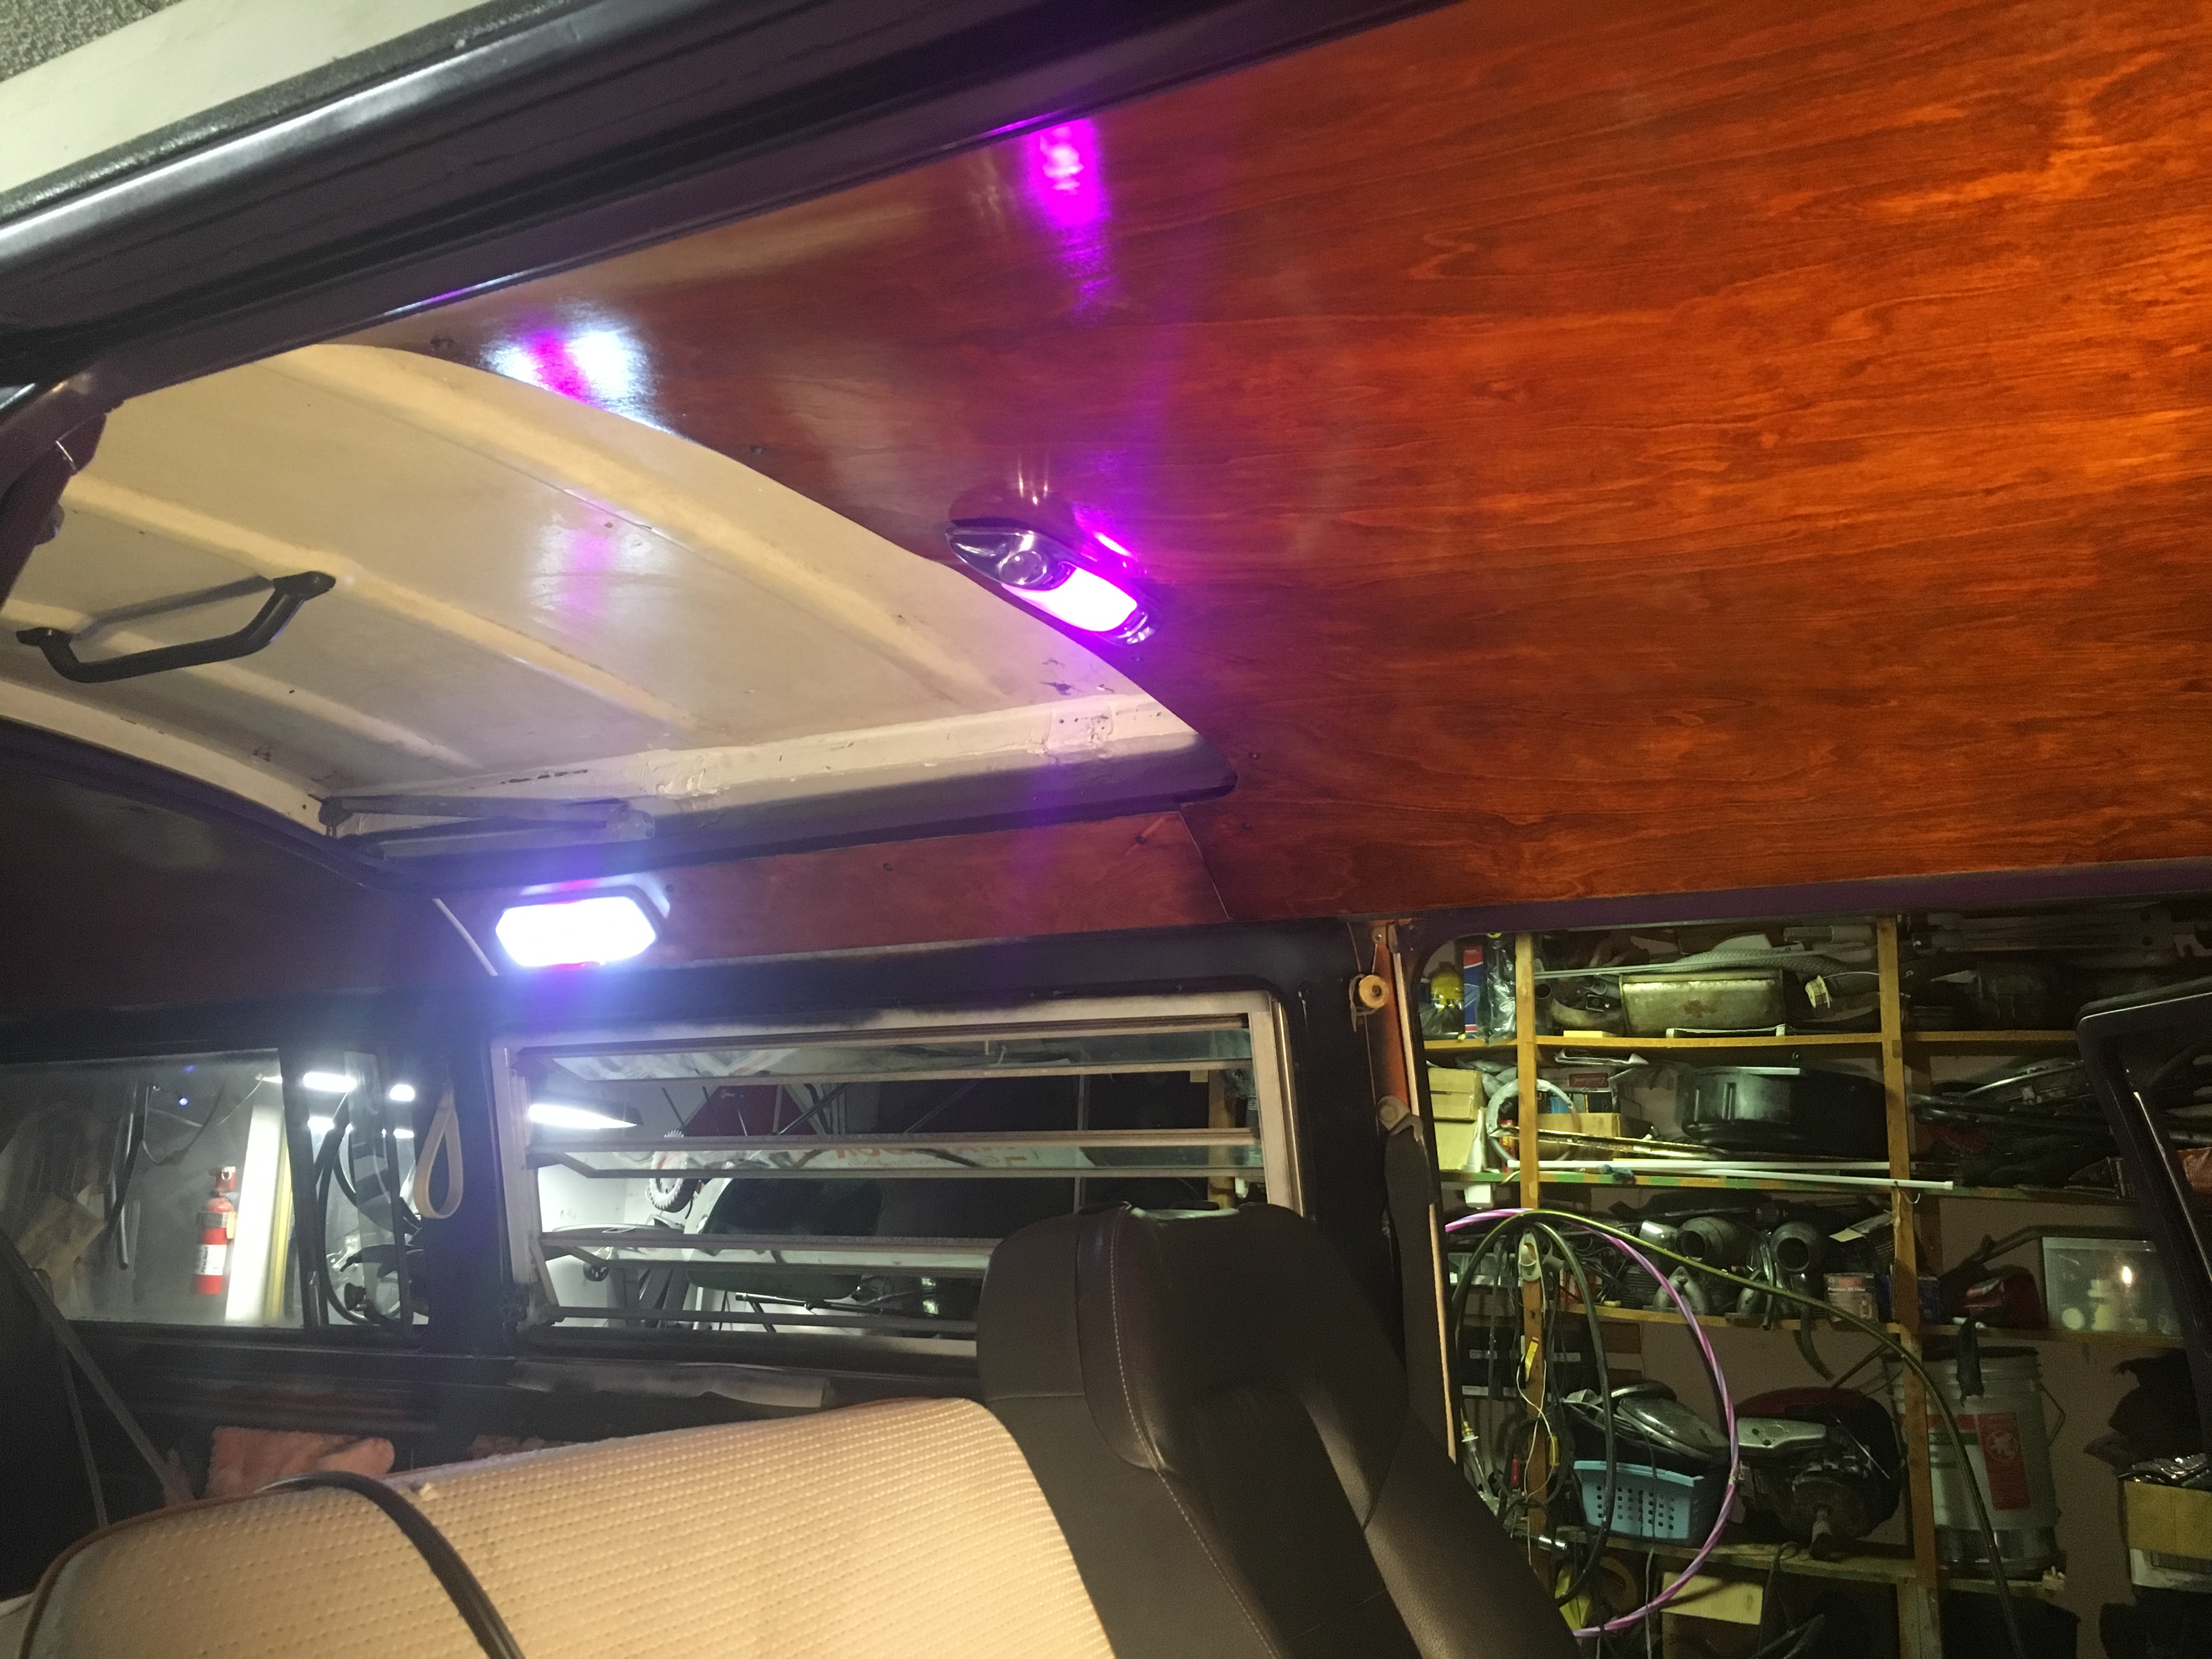
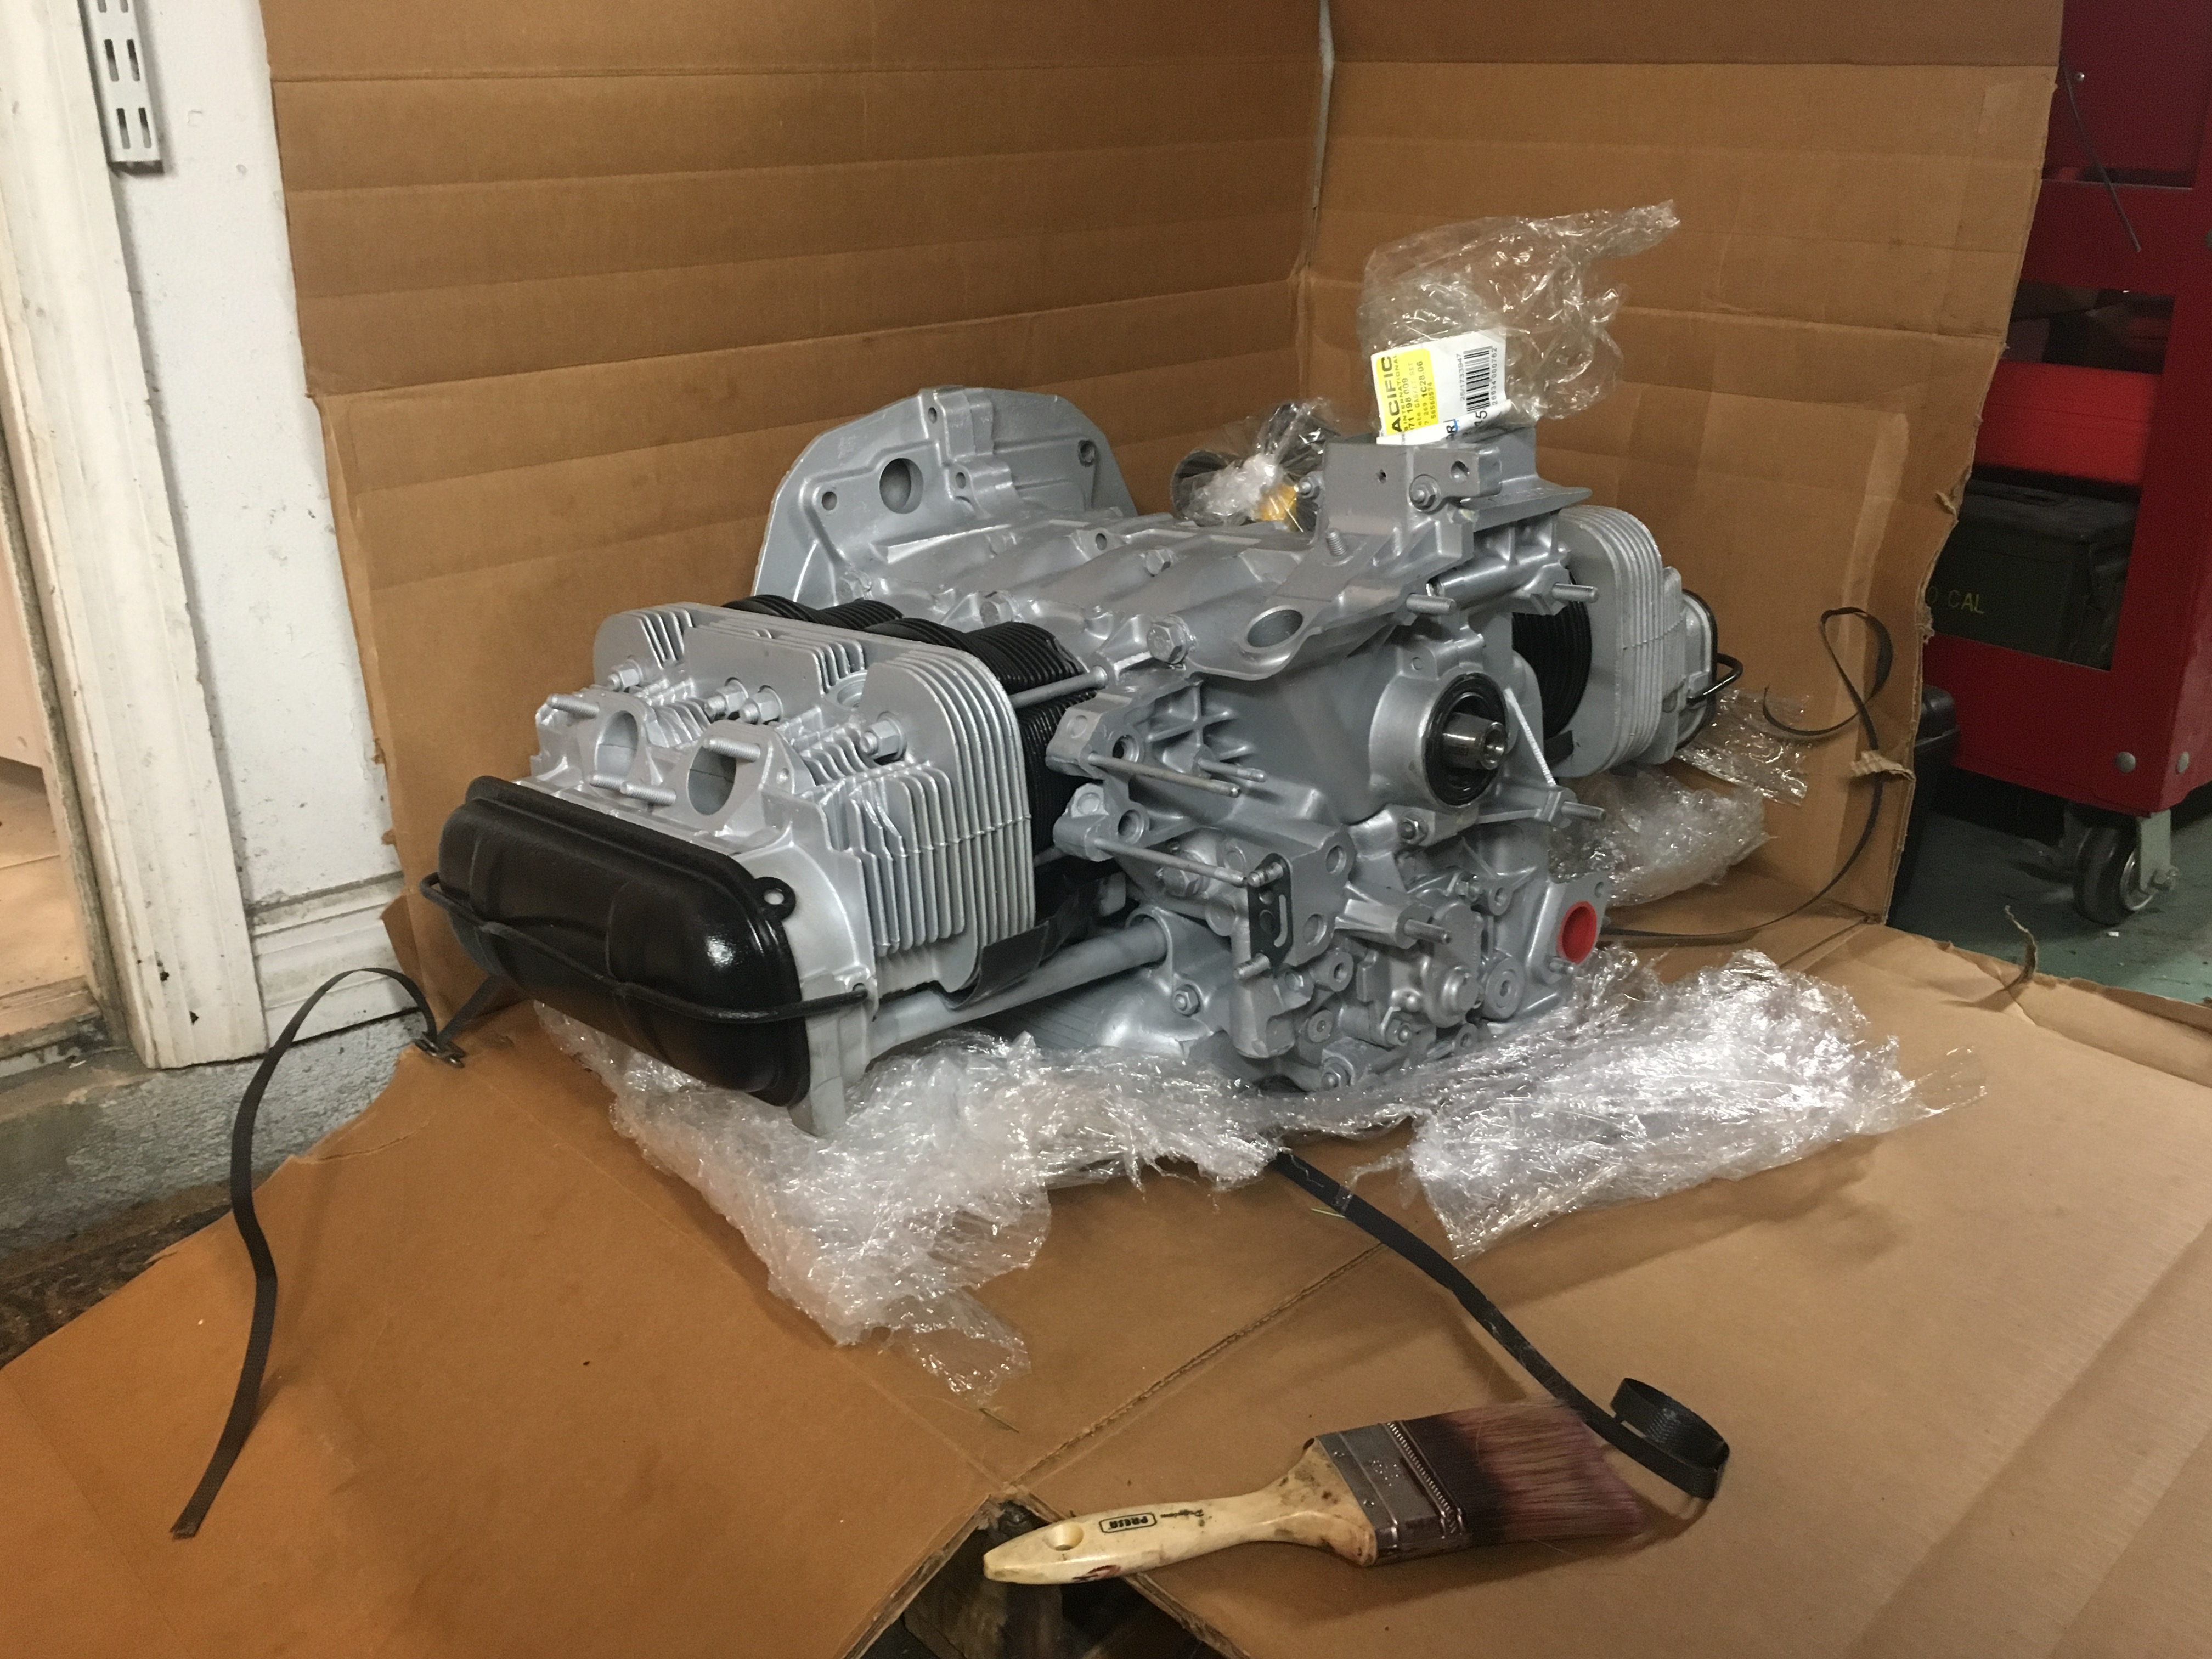
As of today I have redone most of the interior pieces and restored the dash, the motor is still running, the transmission is cleaned up. Yesterday I quickly cleaned the Westy fiberglass pop-top and luggage rack, they look good. I have a new wiring harness ready to go in after I finish bodywork and paint. Today I refreshed the fuel storage system.

Over the past few weeks I cleaned out and re-sealed my fuel tank using the POR-15 fuel tank sealer kit along with a lot of muriatic acid (rust remover). I painted the outside of the tank, then stained it with other paint. I also replaced all the hardware, new fuel sender, fuel screen and line, all new fuel lines and clean brass pipes for connecting the tank to the fuel ventilation system. I also replaced the fuel filled neck, which was completely dried out and cracking. After 7 or 8 years the fuel tank is clean, sealed, and back in the bus ready for the motor and fresh fuel.

I also rescued my windshield from the side of the house scrap yard. When I began the rust repair I pulled out the windshield. The weather stripping was shot and there were many rust holes around the windshield. I carefully moved the windshield to the side of the house and put some beetle parts over it to keep it safe. Seven years later it is overgrown with grass and weeds, covered in dirt, and partially exposed., but undamaged. Cleaned up the windshield and moved it to a couch in my back room.

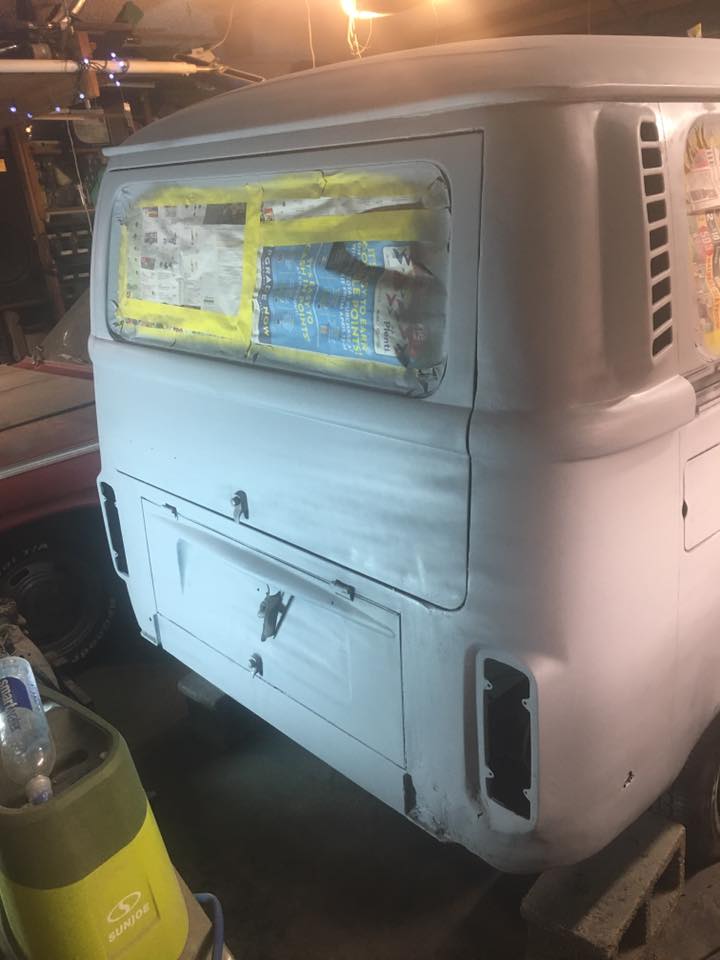
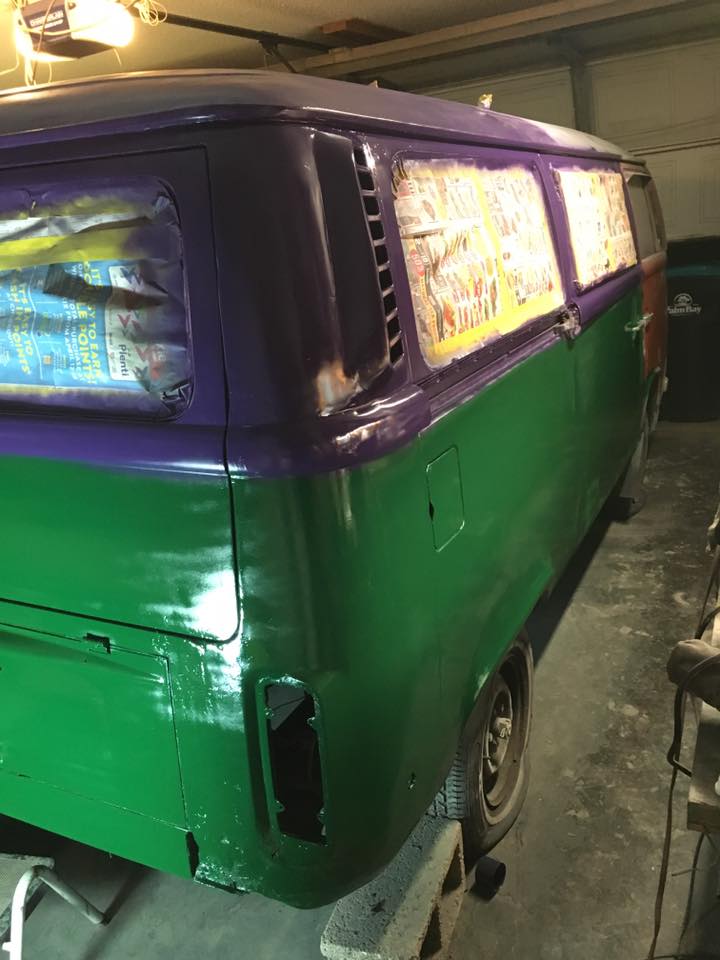
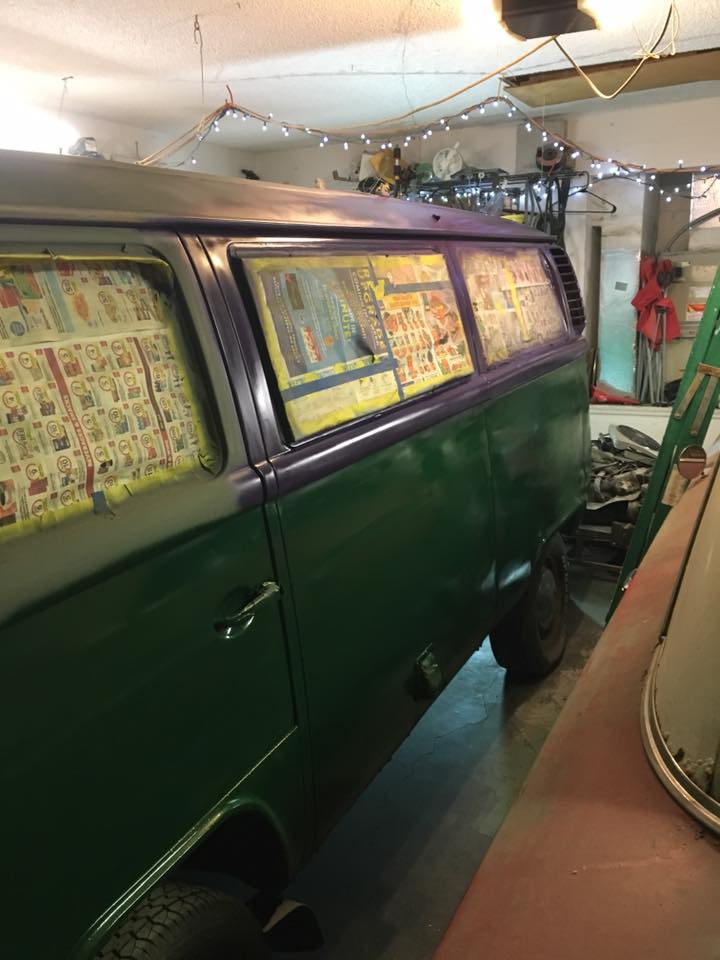
I’m close to being able to start paint. I need to finish the last of the body filler work, sanding, and priming, then I’ll start painting roof down. Due to work deadlines, cruicial house repairs, and fibro flareups, progress has slowed down over the past month. I want to have the bus in paint by the end of May, but I’ll be okay if it takes June. Then I can get the windshield in, reinstall the camper interior, and put the roof and luggage rack back on. At some point after that I have a nearly complete set of weather stripping to redo almost every window and door on the bus. Finally, I’ll be able to finish the automatic to manual conversion, do an engine rebuild, refresh the brakes, try to install AC, then I should have a running, driving bus.

I’m super excited ^_^

Note: This was originally drafted in late April, 2017

I took a short break from my normal use of technology in March. It was a nice change as I’m often on the computer after work and the weekends. Unless I’m doing house or car repairs, I’m usually I’m studying new concepts, doing research, updating my Gentoo desktop, tinkering with one of my SBCs, or working on one of my personal projects. More recently I have gotten back into automotive work. Besides usual maintenance on my Audi, I’ve been working on putting my 1962 Impala back on the road, plus it was time to put my 1973 VW Westy camper bus back together.

Long before the fibromyalgia affected my life I was a very active person with multiple active projects. Late summer of 2006 a friend and I bought this rusty bus from a dude in Orlando, saving it before it went to scrap. We talked a lot about what we would do with the bus, cleaned it out a bit and tinkered on it. It had no engine, scary looking electrical, but was solid. A few years later I became sole owner of the bus and decided to take it apart. I wanted to teach myself auto restoration on it, then I could restore my Impala. At the time I was working on my masters degree and a very demanding job. It took a few years of very intermittent work for me to pull it apart with help from friends. During that time I obtained a couple of engines, a nice transmission, and various used parts, with the bus interior becoming furniture in the house.

I finished my masters degree and started work on the bus, just in time for me to experience bilateral carpel tunnel and guyon’s canal syndrome. I could barely use a keyboard much less lift a wrench. Months after surgery, in late 2011, I tried, but could barely work on the bus for 15 minutes before I would flare up. I gave up on the bus and focused on my newly acquired Benz. The Benz didn’t require the body and interior work I had planned for the bus.

In fall of 2013 I moved away and said bye to my bus, with the intention of handing the project over to someone interested in it. Life got in the way and the bus sat in the garage while the family renting my house became squatters. Fast forward to 2016, I end up moving back to my, discovering the bus and all its parts were left untouched; all I needed to do was body work and throw the bus back together.

It’s now 2017, late winter, and I need a break from Technology. The bus and all of its parts are taking up too much space, constantly getting it my way. It was time to start putting it back together. First thing was rust repair, which, because most of my body working tools, welder, and welding supplies were stolen, would mean rust removal with my die grinder and power drill, then fiberglass. While the fiberglass repairs were drying I started cleaning up and reassembling the interior, including stripping and refinishing all the wood panels. The more I worked on it, the more excited I became about it and the more work I found needed to be done. I’m dreading installing the electrical.

Now it’s April and I’m back to using computers. The bus I work on a few days a week, it’s coming along nicely. The break from tech was nice and recharging, I no longer feel burned out using computers after work. It also feels healthier to split my free time between house repairs, bus work, and computers. The house repairs are exhaustive and stressful, computers are my passion, but I’m on the computer 10+ hours nearly every day, cars are a nice break.

The Panasonic RC-6064 is an AM/FM clock-radio produced in the late 80s and early 90s. This one I received as a Christmas gift in 1989 and has served me well over the past 28 years. A few years ago I tried to replace it with a newer clock-radio that had an iPod dock. The blue lights from the new clock-radio keep me up at night, so it was time to switch back. Two things my childhood clock-radio always needed was aux-in and an external FM antenna. Thanks to the chipset diagrams available online I was able to figure where I could mod the circuit to add these.

Aux-In

The clock-radio uses a Sony CXA1019P IC (IC2 on the board), an AM/FM IC with built in power amp. By tapping into the AF in pin (pin 24) for the power amplifier, I was able to wire a 3.5 mm (1/8th) headphone jack directly in.

Sony CXA1019 IC Diagram

R and L aux-in soldered to the AF In pin and the ground wire soldered to ground on the IC.

External Antenna

The external antenna took a little bit more work to figure out. I had to figure out where in the circuit I could tap an antenna into. Using circuit diagrams I found in a google search I was able to discern that the antenna circuit should come off of the FM RF in pin (pin 12). From there I used a test lead on a weak station to identify the ideal spot on the circuit board to solder the antenna lead to. I ended up following the traces and found an unused hole immediately in front of the radio/alarm on/off switch. I was able to wire the lead to there and ran it out through the back of the case.

The external antenna starts off as the small black wire in front of the left slider switch

The wire is soldered to the antenna circuit which happens to have a trace running along the top of the board in this photo

Final Results

It is all working. The aux-in works great with my various audio players and cell phones, the external FM antenna helps me to better pull in the public radio station I enjoy listening to.


Having recently completed the mods to my Bravo v2 hybrid tube amp, I felt the itch to mod the headphone amp I use at home, my Gemtune APPJ PA1502A. This amp provides full tube amplification instead of a hybrid design. I picked this amp from Massdrop at a very reasonable price. Unlike the Bravo, this promised to be an amp that did not need mods, only a good set of tubes to bring it to life. Stock the sound was crystal clear, but too flat in the lower ends for me, expanding the bass would be a priority. Upgrading to better tubes made a world of difference. Once I had broken in the new set of tubes I decide to perform a small mod and upgrade the inter-stage coupling caps, this sound deepen the bass even further.

Stock APPJ PA1502A

Stock Gemtune APPJ PA1502A with the original tubes

Rolling New Tubes

This is the easiest mod that one can perform, replacing the tubes with better ones. Replace the 6N4 with a 12AX7 or 5751 type tube. I’m currently running a Sovtek 5751. Next the two 6P6Ps should be replaced with a pair of good quality 6V6s or 6L6s. I have a set of Tung-Sol 6V6GTs and a set of JJ Electronics 6L6GCs that I have tried in the amp. Both sound great, but I am a fan of the 6L6s. The 6L6 is both physically larger and a more electronically demanding tube, but one that the circuit specs state it can handle.  They will put out more heat, so if that’s a concern, stick with the 6V6.

The 6L6GC is a much larger tube than the 6P6P

The 6L6GC is a much larger tube than the 6P6P

I have also added tube risers. The stock tube connectors are only secured through solder and I had some fear of damaging them when swapping tubes. I added tube risers that take the brunt of the force when swapping tubes around.

Tube risers

Tube risers

Once the tubes were swapped and broken in I was very happy. Break in time seems to be very important for amps such as this. When I first got the amp I had to run it for at least a few hours before it started to sound right. Once I swapped the tubes and let it warm up for another few hours the sound was richer, bass was deeper, and still crystal clear. I’ve read that these amps and any new tubes need to be burned in for at least 48 hours, so expect slight improvements until burn in is complete.

Replacing the Inter-Stage Coupling Capacitors

This is a very simple mod, one that should increase the deepness of the bass, making the amp a bit more lively. I debated performing this mod as I was already very happy with the amp and the 6L6 mod fixed the flatness from the lower end. The inter-stage coupling circuit for this amp uses two 0.1uF 400V ceramic capacitors, these can be replaced with 0.47uF 400V capacitors.

First we need to remove the four screws holding the top of the amp. This top also contains the transformers, which can easily be detached from the main circuit board through four plugs

Top

Remove the four top screws to expose the top of the board. The plugs for the transformed will unplug easily.

Next we need to remove the four feet and the six outer screws holding the bottom plate on. On my amp there is a seventh screw, but it is screw to a post that is screw into nothing.

Bottom

The four feet and six outer screws need to be removed to access the bottom

Bottom of the APPJ PA1502A

The bottom of the amp, exposing the two ceramic capacitors to swap

Next I de-soldered the two ceramic capacitors. The below images show the solder points that I hit with my de-soldering iron .

IMG_8091 IMG_8094 IMG_8090 IMG_8088

Finally the new capacitors were soldered onto the board and the board reassembled and tested.

Inter-stage capacitor upgrade complete

Inter-stage capacitor upgrade complete. White ceramic 0.1uF 400V caps replaced with orange  0.47uF 400V caps.

Next I powered it up and verified that I didn’t short anything out before reassembling.

IMG_8097 IMG_8096

No fire, no sparks, the audio is clear, and my headphones sound great, time to reassemble and put back where it belongs.

Gemtune APPJ PA1502A in use

Gemtune APPJ PA1502A in use back where it belongs

Afterthoughts

I spoil myself with this amp, the clarity of the audio is almost startling. I have the amp paired up with a pair of Beyerdynamic DT990 600 ohm headphones. Not a combination that is bass heavy without the mods, but one that will provide some serious HD audio. I let my boyfriend listen to the amp while it was burning it, his eyes told me all I needed to know. Afterwards he described the experience as disturbingly HD, kinda like the first time watching a HD or 48fps movie, almost too lifelike. Goal achieved ^__^

In March I picked up one of these little Bravo Audio V2 class A hybrid tube amps on sale. This neat little headphone amp uses a 12AU7 vacuum tube to provide that ‘warmth’. There are plenty of articles, reviews, and forum posts that go into the details of what this little amp is capable of, plus it’s moddable. I bought it because I love tube audio and I could have some fun and tweak it.

 Bravo v2 Original

First Impressions

This amp looks like it was designed to be modded, but the reality is that the PCB is rather fragile. Traces are prone to falling off, especially if you use a soldering iron that is too hot. The first thing I had to do to mine was retin it with fresh high quality solder. It looked like it had been soldered with J-B Weld, plus it cleared up the audio. Once that was done I started swapping different 12AU7 tubes from my collection, eventually decided on an Electro-Harmonix for daily use. The stock tube didn’t sound bad, but the new EH 12AU7A seemed to handle the highs and lows better. I tested a vintage clear-top RCA, but the low ends sounded muddled, it is possible that the tube is failing. I proceeded to use the amp in this configuration at my job.

 Bravo v2 Original

Time To Perform the Mods – Easy First

The most common mods are component upgrades. Replace the electrolytic capacitors with higher quality 35V caps. Interestingly enough, when I was replacing the caps, I saw that the circuit board states that these should be 35V. This is an easy mod, there are only three caps, 1 – 6800uF, 2 – 1000uF.

New power cap

Final result with new power cap

Upgrade the MOSFETs – Hard Next

Replacing the IRF630Ns with almost any of the IRF510-530 series will improve the soundstage and roll-off. I opted to replace mine with the IRF530N, an improved version of the IRF510. This mod is not as easy as the heat sinks for the MOSFETs should be replaced with larger ones to handle the increased power consumption and thus heat generation. On my board I had to drill out the old heatsink mounts, and some of these mounts do go near traces. I do not have precision tools.

Work in progress on the amp

Work in progress on the amp

In progress fitting of the heatsinks

In progress fitting of the heatsinks

New IRL530N MOSFETs

New IRL530N MOSFETs

The Final Results

I have been using the amp daily for the past week. It sounds so much better now, a noticeable improvement. I consider the amp and the mods a worthwhile improvement.

The final result

The final result

Project: API Web Server

I am currently building a simple Node.js based API web server. It’s primarily a proof-of-concept project that will be used when developing the API for another project. I have written similar servers for other projects in the past, this one should be cleaner and easier to use.

At the core of the server is the node http2 module. This provides the HTTP/2 web server, plus fall back to HTTP/1.1 support. HTTP/2 is the latest version of the hypertext transfer protocol and supports multiplexing data transfer connections, allowing multiple concurrent data streams. HTTP/1.1 serializes data transfer, meaning one stream has finish before another can begin. Below is the code that instantiates the http2 server

//Options for the http2 server
const httpServerOptions = {
        key: fs.readFileSync(path.join(__dirname, 'keypath/key.pem')),
        cert: fs.readFileSync(path.join(__dirname, 'keypath/cert.pem'))
};

var http2server;
if (process.env.HTTP2_PLAIN) {
    console.log('Setting up HTTP2 Plain');
    http2server = http2.raw.createServer({}, processRequest);
} else {
    console.log('Setting up HTTP2 TLS');
    http2server = http2.createServer(httpServerOptions, processRequest);
}

processRequest is the callback function that handles the server requests, it takes two objects as parameters, request and response.

function processRequest(request, response) {
//process the request and provide a response ...

Since this is a simple server, it does not need to support many options. My current server implementation supports the following requirements:

  • Passes GET and POST requests to the API endpoints
  • API endpoints as modules
  • Dynamically load modules during development
  • Transfers html, js, css, and txt, files with correct mime types
    • The allows it to be used as a basic file web server
  • Display 404 when file or endpoint cannot be loaded
  • Error logging

This is not a complete web server, but it could eventually be. A complete web server would support multiple HTTP response codes, have a plugin infrastructure, support large numbers of mime types, access logging, and numerous other features. At this point it is good for development and is easy to expand.

Since I have written similar servers in the past I looked at my previous code bases, it wasn’t pretty. I ended up finding duplicated code and signs of obvious confusion. When I coded the new server I made some similar mistakes, but upon reviewing the code I was able to move duplicated code into dedicated functions, then reworked the flow of the requests so that the main method was simpler. In the past I over complicated functions, stuffed too many actions into them. Simplify the methods increase the number of overall methods, but produced code that is easier to read and debug.

I added dedicated methods for displaying 404 messages, writing content and its mime type back to the requester, and wrote a method dedicated to handling POST and GET requests.

function processRequestMethod (request) {
  if (request.method === 'POST') {
    var data='';
    request.on('data', function(chunk) {
      data += chunk;
    });
    request.on('end', function() {
      return qs.parse(data);
    });
    request.on('error', function(e) {
      console.error('ERROR with POST request '+e.message);
    });
  } else {
  //Process as GET
    return qs.parse(url.parse(request.url).query);
  }
}

My Next goal was to dynamically load API modules, to be continued in part 2.